Tag Archives: sewing

soclose

Kaylee progress

Kaylee progress

Kaylee progress

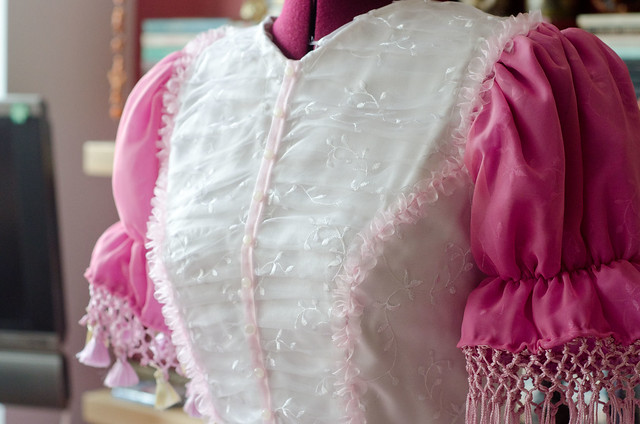
Not gonna lie guys, I’m freaking out a tiny bit. PAX is in two days and while I’m very close to finally being done with this dress, I’m not quite close enough to total done-ness that panic isn’t starting to crawl up my butt a little bit.

Things I still need to do:
-Back zips on both the top and bottom
-Peplum, plus peplum ribbon trim
-Ribbon waistbandy thing
-Neckline lace
-Finish the sleeve trims and iron the sleeve hems without burning said sleeve trims
-Figure out how to seam the back of the skirt
-Figure out how see-through the skirt is and whether I need another petticoat

Yep.

The good news though, as some of you may have seen on my Instagram, is that I managed to cobble together a decent looking hoopskirt! I was thinking of posting a tutorial but mine came out kind of derpy so it’s going to hide under that giant gorgeous fluffy mess in shame. I’m happy to post links to the many many existing (and much better made) tutorials I referenced though, if anyone’s interested. If anyone’s interested in learning how to make a derptastic hoopskirt I’m happy to post about that too.

Speaking of hoopskirts, now that the cape is back, can be make hoopskirts be next. They score basically a zero in terms of practicality but omgsomuchfun.

Anyway, I promise I’ll post a more detailed post with more explanation and detail shots (and maybe even some of me in it!) when it’s done.

In the meantime, check out the awesome giveaway one post back.


Tutorial: Lady Peggy

Peggy dress

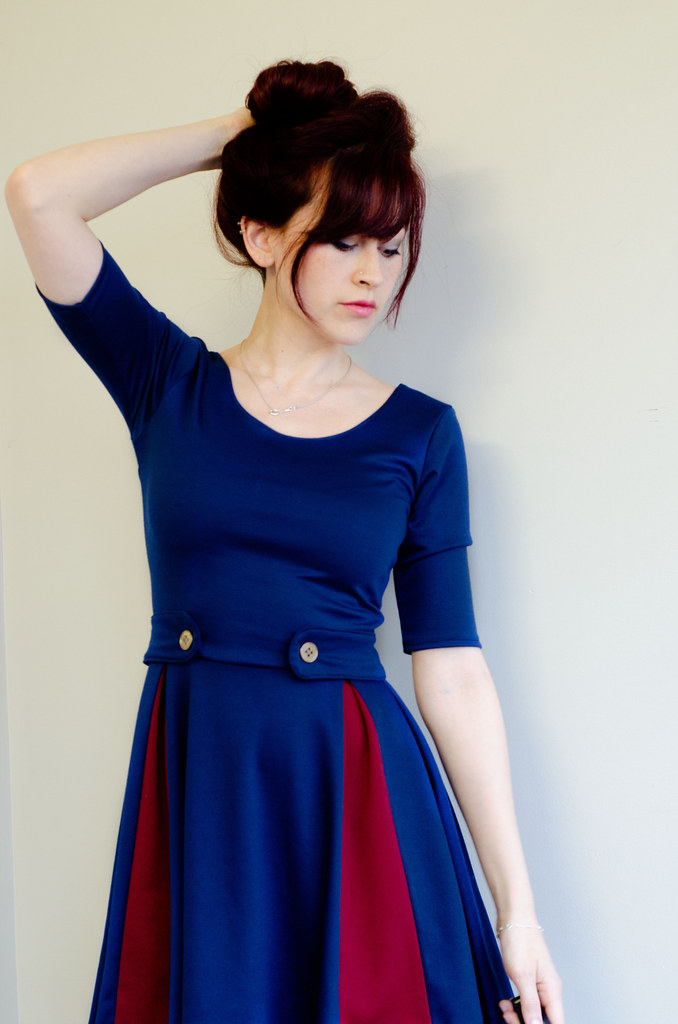
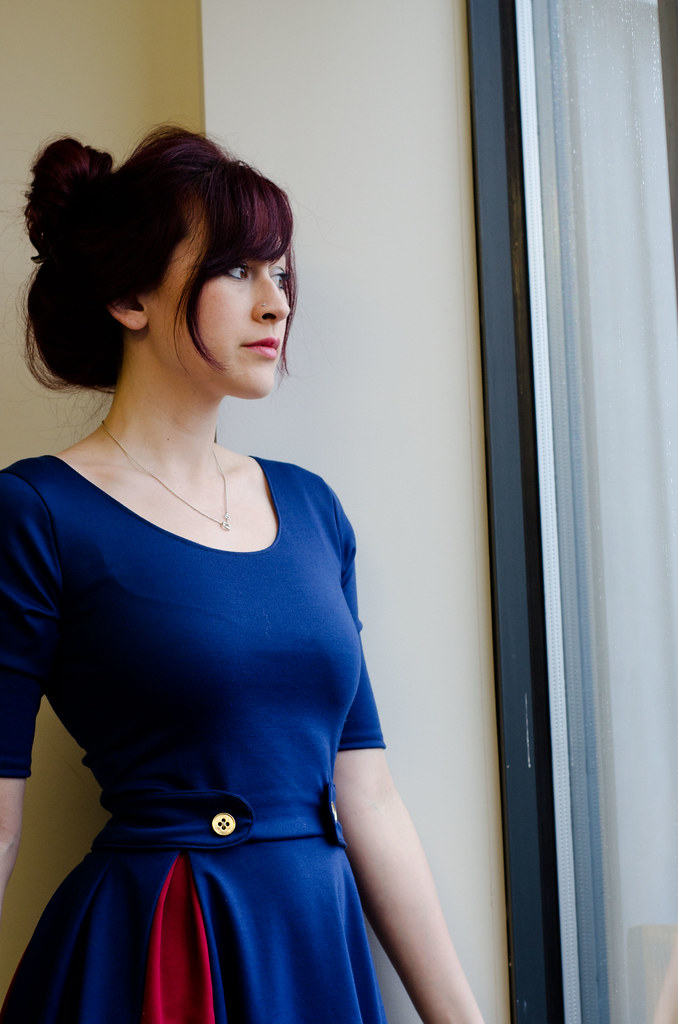
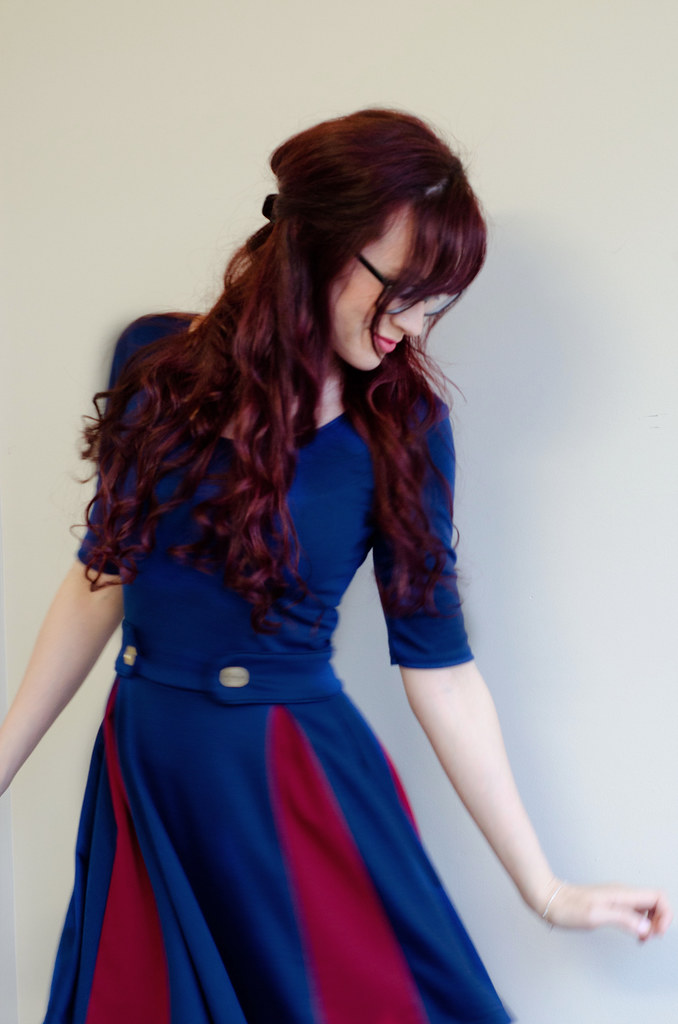
As promised, here’s a tutorial of how I made my navy and red Peggy dress from the Lady Skater pattern. I used thick knits for this but if you decide to use a woven fabric you can still apply the same general technique for the paneled skirt as long as you start off with a similarly shaped pattern meant for wovens.

What you’ll need:
-the Lady Skater pattern
-fabric as indicated by the pattern
-about an extra half yard of contrasting fabric
-two 1″ buttons (Peggy’s dress has gold ones)
-thread to match both fabrics

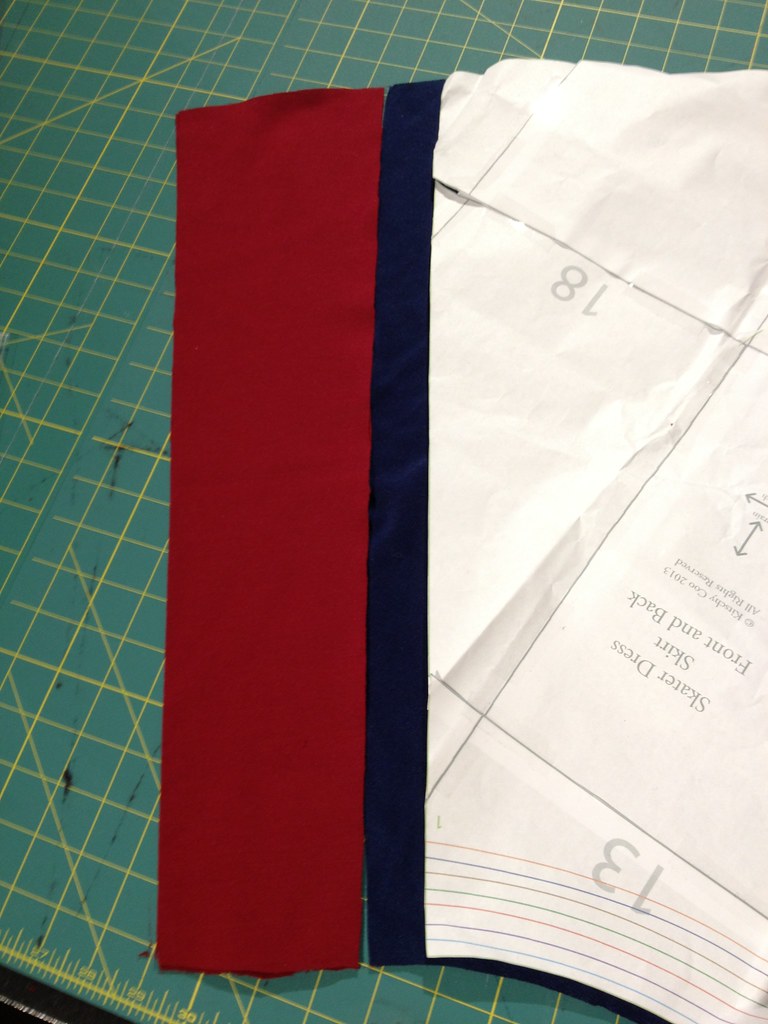
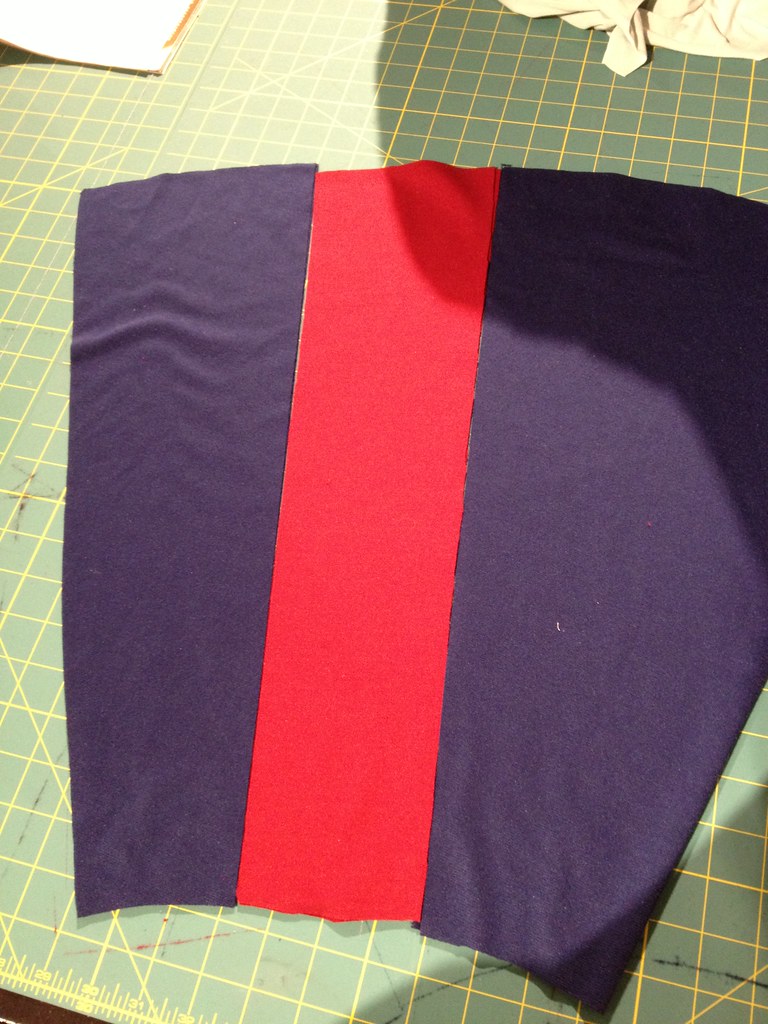
I started off with the skirt piece. Since I was using a thicker knit with less stretch than the Lady Skater pattern calls for, I cut about an extra inch past the skirt piece. I then cut a rectangle in red the same height as the skirt piece and about 5-6″ wide, depending how subtle you want the red panels to be.

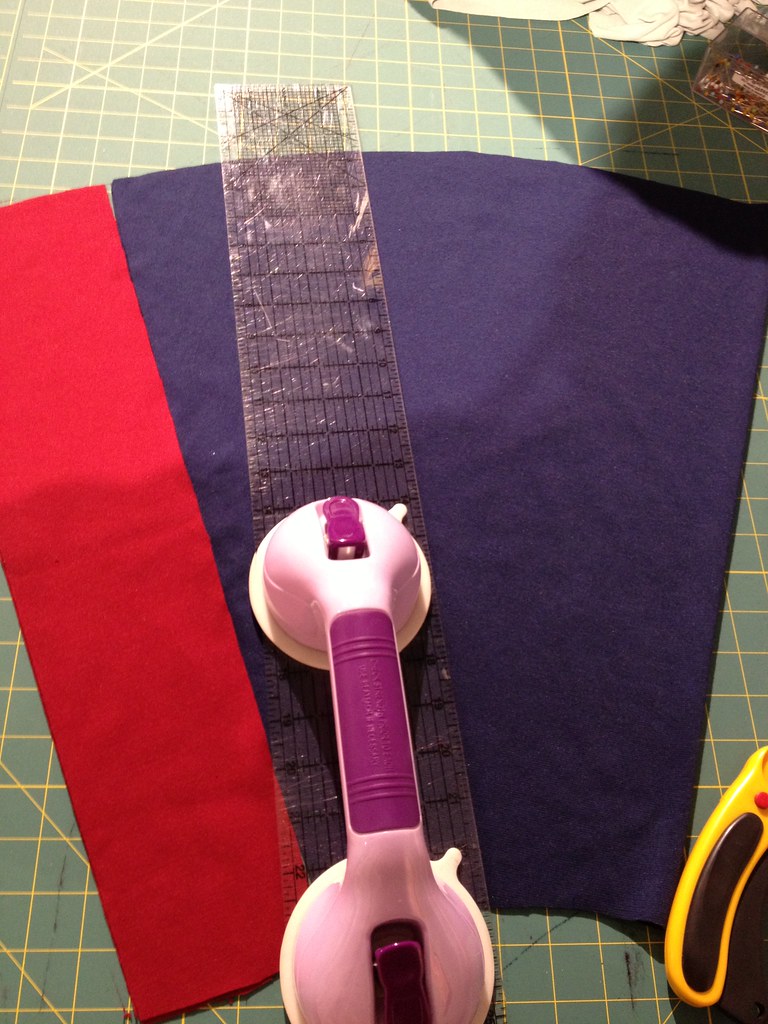
The photo on the right shows the ruler marker where I cut the navy fabric. I sort of eyeballed it. The navy fabric is one half of the skirt, cut on the fold.

Peggy dress how toPeggy dress how to

Once you’ve cut slices off the navy fabric, rearrange the panels so the red rectangle is inserted between the blue slices. Peggy dress how to

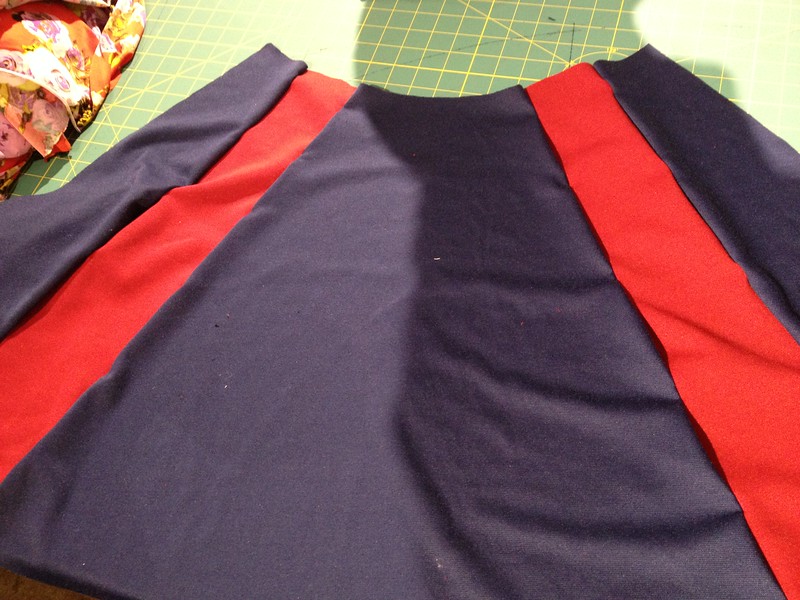
When you’ve sewn all the panels together, they should look like this. Remember, this is still just one half of the skirt. Now go back and do the same thing for the back of the skirt.

Peggy dress how to

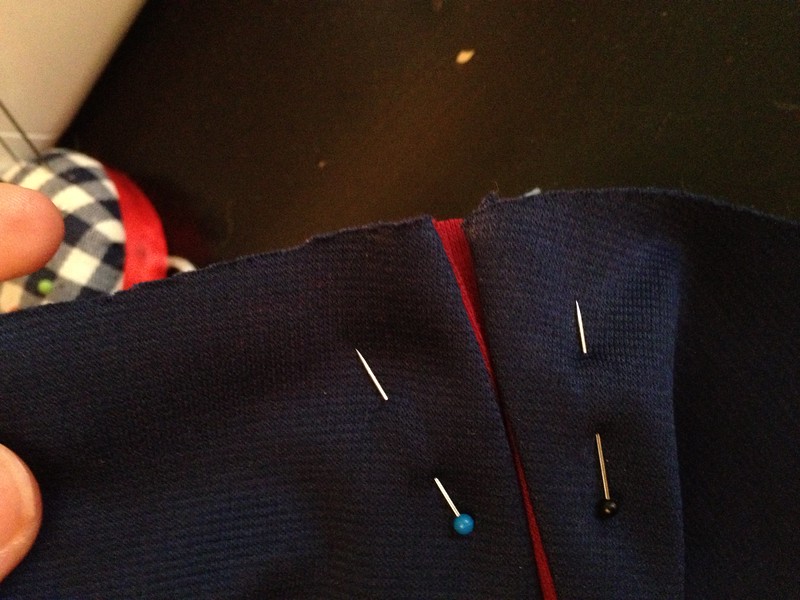
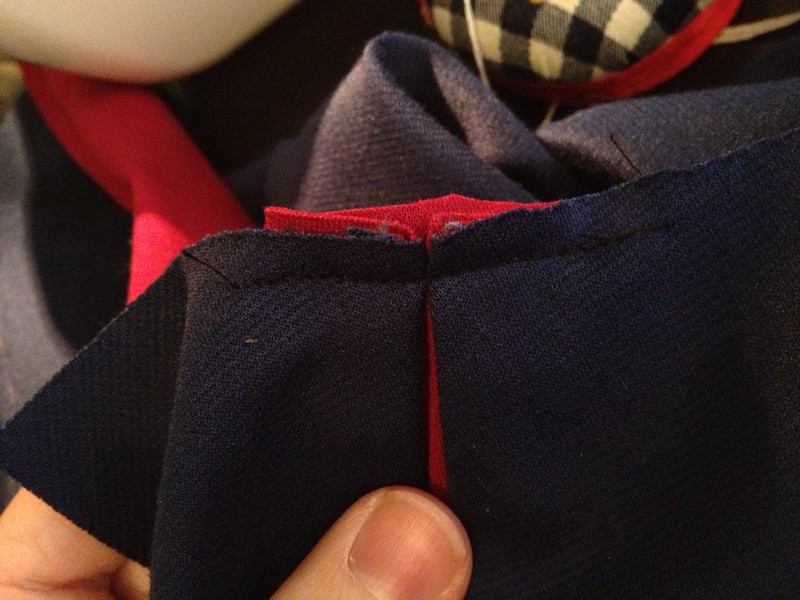
This is the fun part! You’re going to make a single box pleat at each red rectangle as shown. Baste it in place and treat it as normal.

Peggy dress how toPeggy dress how to

The rest of the dress is made mostly according to the pattern. The only changes I made were to omit the neckband and just folded it over instead. Ditto the sleeves.

I also made the waist button tab thing that I forgot to photograph but it was pretty simple to make. I measured the distance between the two front pleats, added about 2″ for seams and so it would lie past the pleats, and then cut two long ovals that length and 2.5″ tall. I sewed them together, leaving 3″ open on one of the side seams, and then turned the whole thing inside out and top-stitched around it, closing the open 3″ in the process. It’s attached to the dress by the two decorative buttons in the front.

Peggy dress
And there you have it! A Lady Peggy.

Interview: Deborah Fisher

Sleepy bunny

In addition to reviewing Deborah’s new book, Sew Fun, I also got to interview her about crafting and the creative process behind her new book! My questions are bolded and the responses are in her words.

And as promised, here is the beginning of my bunny army. (This is the Little Smiles Bunny pattern from Deborah’s book.) I actually used leftover bits from this dress.

What was your experience with crafting as a child?
I have always been maker and I grew up making all kinds of objects. We had a big round table for projects in our family room. There were shelves filled with fabric and paper and trims and other supplies. My mother’s sewing machine was always there and ready for us to use. I was fortunate to grow up in an environment created by my parents, who value the handmade.

What is important to you about engaging kids in crafts?
There is a joy that comes from the process of creation that I think is essential for children to experience. I see it with my own kids and with my students. And they have so much to teach us grownups!

What is your #1 inspiration?
I am inspired when what I make brings a smile to someone else.

I work with what is in my own small world. A flower in the garden, my daughter’s drawing, a ceiling tile. Whimsy, color, stories. Ultimately though, it is the effect of what I make that is my inspiration, even if I am just making myself laugh.

What was the first thing you ever made?
That’s a hard one! I remember a parrot mobile I made out of felt and wire. I glued the felt together and sat the parrot on a wire ring perch that probably started out life as a coat hanger. That was the start of my love affair with mobiles. I made dozens of them for my room.

What are your favorite materials to work with?
I am such a mixed media maker. To me, the materials are the meaning, the essence of the object. My favorites are what the meaning tells me the materials need to be. If I am making quilts that need to be bold and durable, that tells me what I need to use. If a stuffed lion needs to be textured, then that is what it needs to be. It is not about what I want to use, but what the object needs to be made of. I love the tactility of fabric and textiles so I hope the objects I make keep telling me to use them!

Sleepy bunny

What does crafting mean to you/do for you?
For me, making is just a way of being. Right now I sew and design quilts and other sewn things. But if I couldn’t do that I would absolutely find another way of making, other materials to use and other objects to make.

What was your biggest crafting flop?
Oh, there are so many! Ugly quilts, misshapen dolls, clothes that will never fit. Many, many clothes that will never fit. I have them all!

What is your favorite thing you’ve ever made?
I am very hard on myself. Often I will really doubt what I have made but looking at it months or even years later I just love it. I need that distance. My favorites are not specific projects but collections or groups of projects like Sew Fun and programs of the Bright Hopes Collaborative Quilt Project which I started with my mother in 2003.

What is the hardest part of sewing for you?
The hardest part of making anything is trusting myself. That is one of the best parts about sewing with kids. They have a freedom that is incredibly inspiring.

What is your favorite sewing technique?
Tying a proper knot at the end of the thread when hand sewing! I didn’t learn how to do this until I had been sewing for a good 10 years. When I discovered it, it was like I won the sewing lottery!
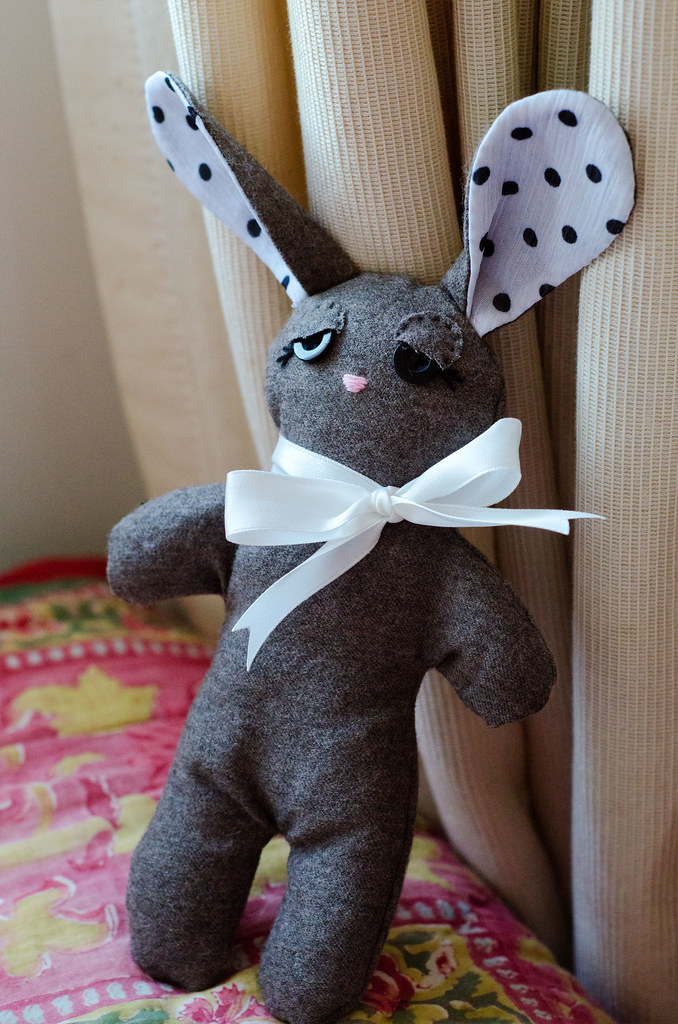
Sleepy bunny

You are hosting a crafting tea party: who is on your ideal guest list?
What fun! My 2 girls, of course. My mom who taught me to sew, encouraged all kinds of making, and is a tea party expert. My friend, Susan Borger, who sews the most amazing chenille projects and is an incredible knitter. Illustrator Amy Saidens who I spent lots of time making great stuff with when we were young. My high school art teacher, Joan Singer, who is now my friend. Artist and soft sculptor Dorothy Lazara who I was an assistant to when I was a teenager and who taught me how to sew fun. (She died a few years ago but you did say ideal!) And if we are going that way, then my Grandma Ro who taught me to knit as well as swim. I could go on and on. These may not be well known names, but they are all amazing makers who have inspired me and encouraged me in my life and work.

What is your #1 guilty pleasure?
These days, cake. My older daughter has recently become very interested in baking and cake decorating. She made a cake with my mom and brought the whole beautiful thing home. I think I ate 3/4 of it myself. I’m not kidding.

What is your favorite project in your new book?
Hazel Doll! Dolls were one of the first things I made when I started sewing. I think there is magic in creating a friend. And the accessories are so much fun to make.  The Hazel Doll has a reversible skirt, a reversible top and a one pattern piece jacket that can be embellished with embroidery and trim. You can make shoes, slippers, a boa, and a ladybug cape for her also. I could have made a dozen versions of her if I hadn’t had so many other projects to make.

How are your craft projects unique?
I think my projects are unique because they juxtapose seemingly divergent ideas. They are cute yet sophisticated. They use basic sewing techniques but challenge the maker to push their personal boundaries. They are inspired by children’s drawing and ideas yet are far from childish.

Why did you choose to create this book?
For many years I was searching for the best ways to share what I love to do. I am very fortunate to have the opportunity to share my ideas in this way. I hope Sew Fun inspires adults to have fun with their sewing and share the joy with kids.

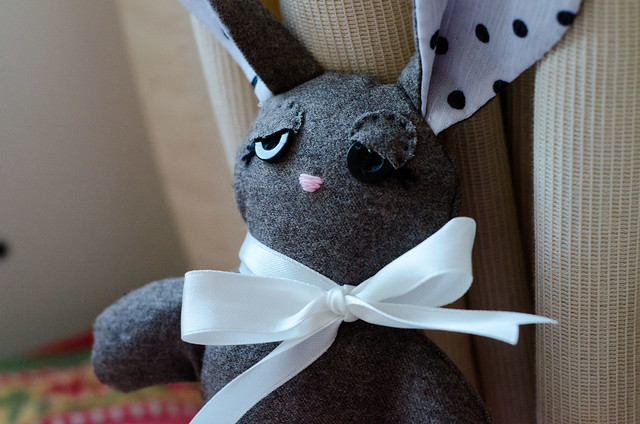
And just for fun, I thought I’d share a scary progress photo of the bunny. I have dubbed this photograph “Murder Bunny”: he’s terrified he has to kill you.murder bunny
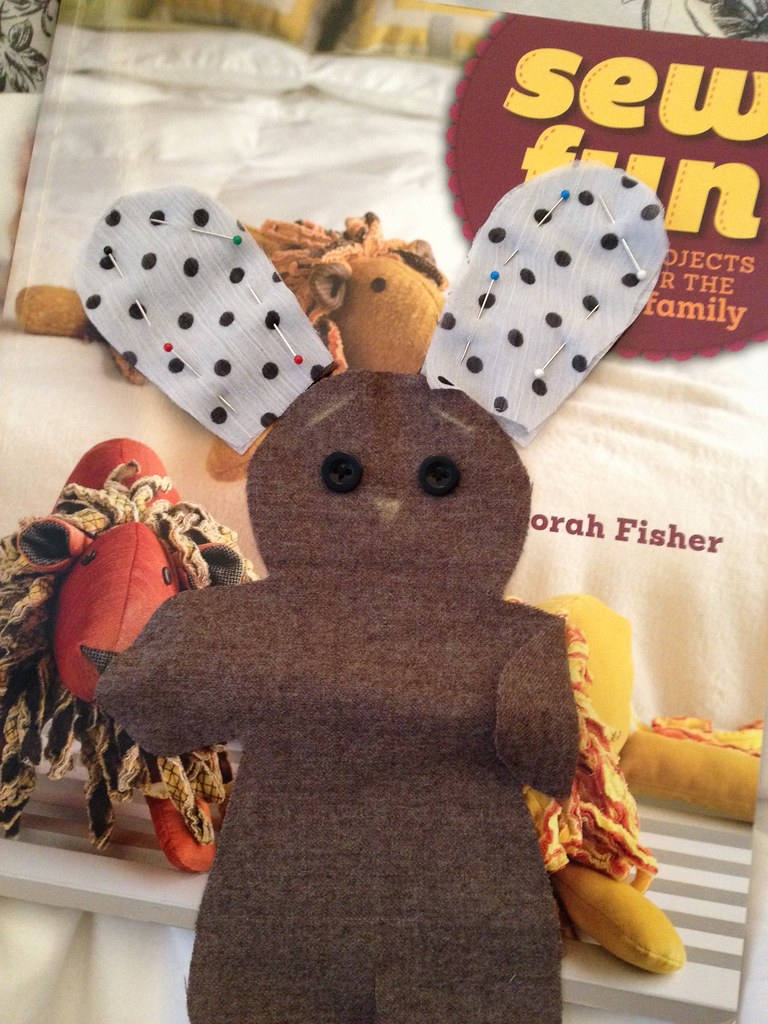
Thanks so much, Deborah!

Old men snoring

Vintage dress

Vintage dress

Vintage dress

Vintage dress

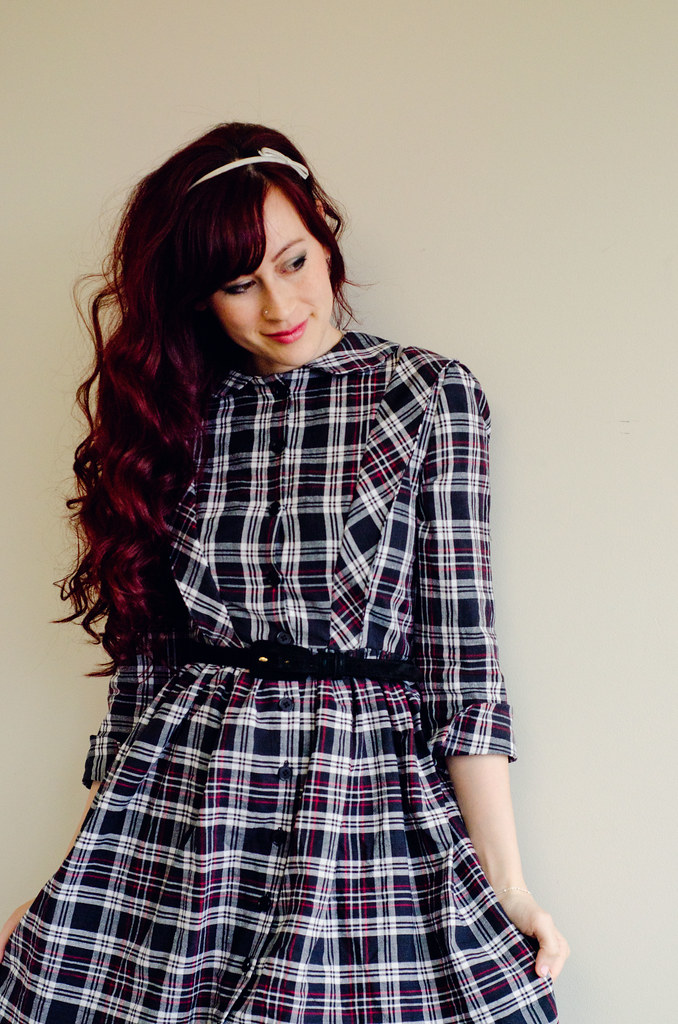
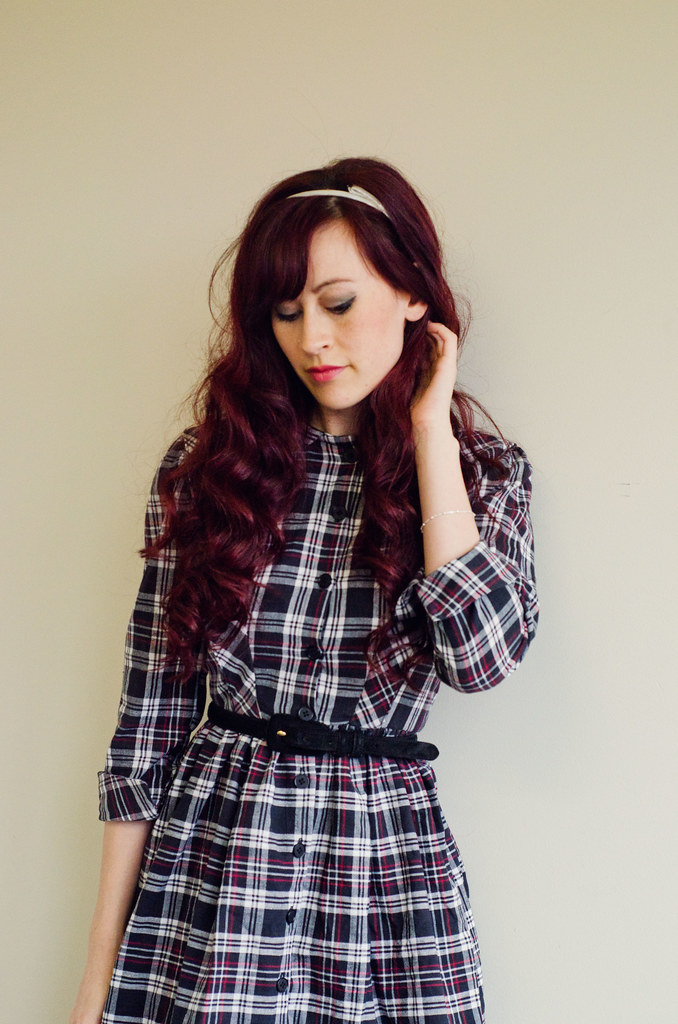
Vintage dressdress: self-made // shoes: Shelly’s London // headband: JCrew // belt: thrifted // tights: F21

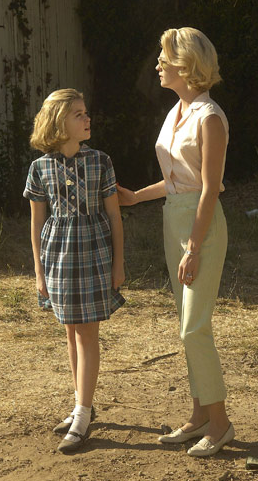
One of my recent goals has been to try out some vintage patterns. I found this one on Etsy and pretty much dove in head first. The instructions were a bit confusing and the pieces were super brittle so there was a fair bit of tracing, marking, and trial and error before I finally worked it all out. I chose a plaid cotton to match my inspiration dress which in retrospect wasn’t the best idea because plaid matching is hardddd. Especially when you sort of have no idea what your’e doing. Yay!

Anyway, here’s the dress I was loosely basing this one off of:

sally draper

The really cool part about using this pattern was that someone had done somewhat of an FBA on this pattern and had used old newspaper scraps from 1961 to reinforce it!

I’m pretty happy with how this one came out but I’m definitely going to make some adjustments for next time. First of all, I definitely need to learn how to do a FBA. Secondly, whoa short torso. I’m definitely adding at least two inches. I also completely goofed on the skirt and just assumed they wanted me to cut two of the skirt panels. Whoops. There were supposed to be three. I ran out of fabric and just went with it but I’m kind of sad that the skirt isn’t as floofy as it could’ve been. Oh well, the next one will have extra floof to make up for it. I’m thinking of doing a more modern take for my next one. Maybe in black minus the diagonal trim thingies and with a slightly more exaggerated beaded collar and white contrast cuffs.

In other news, my capstone project is nearly done! Which is a good thing because my brain is very tired.

PS How cute are these shoes?? They were a birthday present to myself and I’m quite aggravated that it’s raining because I want to wear them ALLTHETIME.

Peggy

Peggy dress

Peggy dress

Peggy dress

Peggy dress

Peggy dress

Peggy dress
dress: self-made, pattern here // shoes: Chelsea Crew

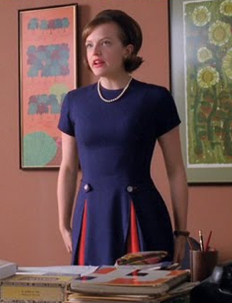
So a few weeks ago I was catching up on Mad Men and saw this dress.

peggydress2

And then Julia Bobbin announced yet another Mad Men Challenge. Um, yes please!

So then I had to figure out what pattern I wanted to use and whether I wanted to go woven or knits. At first I was thinking of using a wool blend and one of my go-to patterns, but then I realized I had the perfect double knit in navy and scarlet and that my trusty Lady Skater would be perfect!

I made a few adjustments as usual (omitted the neck band, shortened the sleeves, added the waist tab thing and the skirt panels), and I actually took some photos for a tutorial post I’ll put up later this week.

And as an added bonus, if I ever go to see a Barcelona soccer game, I’ll be all set in the wardrobe department!