Tag Archives: outfit

Saffron

Orange skirt

Orange skirt

Orange skirt

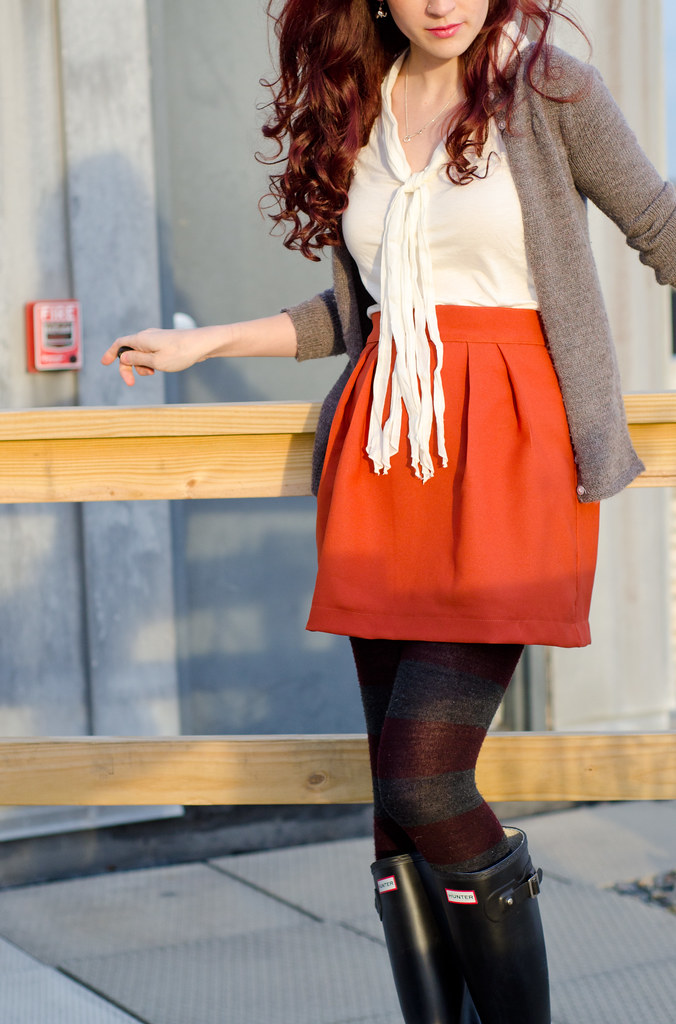
Orange skirtskirt: self-made // top: thrifted // sweater: self-made, pattern here // tights: Modcloth // boots: Hunter 

Remember that really simple skirt I made a few of a while ago and then promised to make a tutorial? Well, I FINALLY sat down and made a tutorial. I’m just putting the finishing touches on that so expect that later on this week. Yayy!

I keep flipflopping between wanting to write a post about the new year and then getting kind of turned off not wanting it to seem too New Years Resolutiony. I definitely have ongoing goals, but not ones that I came up with for the sake of the new year, but maybe I’ll just list those, if only in a futile attempt at organizing my brain.

Tutorials: I have a few simple tutorial ideas bouncing around my head (including this one) that have been living on the back burner and I want to finally do those. So far so good!

Layer Cake dress: Obviously this one needs to be done by April. I’m currently waiting on the rest of my supplies but I think I’m still ahead of schedule on this one.

Wearability: There have been several posts in the past few months about wearing me-mades and why it’s sometimes hard, so I’ve been trying to make more things that are more wearable (meaning more solids and diving into the world of knits).

Albion coat: I’ve been wanting to learn to make a coat for a while and haven’t quite gotten to a point I’m happy with. I started with the New Girl blazer and then sort of stumbled my way through half of an Anise coat (I picked the wrong weight of fabric so it’s turning into a skirt). I still have plans (and more appropriate fabric) for another Anise but my next coat-related project is going to be an Albion. More on that later, including fabric pr0n.

Vintage patterns: I have a wishlist of vintage patterns that I’ve been eyeing on Etsy. I recently bought one and am super excited to try it. This goal probably contradicts the one regarding wearability.

Costumes: Costumes make me happy. Like really complicated, nitpicky, intricate movie replicas. It’d been a long time since I’d done one before I started the Kaylee dress and I want to start doing that again more often. Possibly starting off with finishing Elizabeth Swann’s wedding dress which is probably my longest standing WIP (I started it ~2007).

Moar Archers: Because of reasons.

Ok, my brain feels better.
Sun drop

Drop-waist dress

Drop-waist dress

Drop-waist dress

Drop-waist dress

Drop-waist dress

Drop-waist dress

Drop-waist dressdress: self-made // shoes: Swedish Hasbeens // watch: Fossil 

So Boston is currently 20F and buried in snow. Which is why I’m pretty happy that my flight was canceled and I got to stay in sunny 70F California for two extra days! To celebrate, we took a beach trip to Baker Beach to hang with the Golden Gate and soak in the sun before heading back to snowy purgatory. (Yes, all you people that said I would get tired of the snow, you were right. Let’s move along now.)

I also got to take my new drop-waisted dress out for a spin! If you follow me on Pinterest you might have noticed the recent influx of drop-waisted dresses on my Sewing Inspiration board and I was so excited when vacation started and I actually had time to figure out how to make one!

I had this navy rayon challis planned for another project but it seemed perfect so I snagged it for this project. In the interest of using patterns I already owned, I chose to use Colette’s Laurel dress as the base. If you’re feeling less adventurous, Republique du Chiffon’s Viviane dress looks pretty cute. It was a pretty simple pattern hack though! I basically just cut out the the bodice front and back as indicated but shortened by about 8-10″ (I did some adjusting so I’m not totally sure of the exact amount I hacked off, and this will depend on your height and how low on the waist you want the skirt to sit). I was also basing my dress mostly on this one, so I cut the sleeves a little wider than the pattern and extended it to 3/4 sleeve length and just enclosed some elastic in the sleeve hem before sewing the sides of the sleeves together.

Then I just gathered two rectangles and attached it as the skirt. Since it’s a pretty loose dress, I didn’t need to add a zipper or anything. I also wanted included a back slit so I just folded the center edge over twice on either side, sewed it down, and then sewed the two pieces together from where the slit ends to the bottom, letting the open bit overlap a bit. Then I attached a small decorative (read: non-functional) button on top that sits over where the top neckline thing attaches. If that makes no sense, let me know and I’m happy to draw a diagram.

In other news, meet my new foot babbies! My mum got them for me for Chreestmas and I basically never want to take them off. They’re a tiny bit ridiculous but four inch heels that feel like flats? With a bow?? Yes please.

Anyway, I hope everyone had a lovely holiday and got to relax at least a little! Mine was a bit crazy but filled with tons of fun and fambly and kittens. I got to take one last nap with the kittehs yesterday and now I’m dragging my feet and trying to think of legitimate ways to avoid getting on that plane tomorrow morning.

Catching snowflakes

Campus jacket

Campus jacket

Campus jacket

Campus jacket

Campus jacket

Campus jacket

Campus jacketsweater: self-made, pattern here // leggings: Urban Outfitters // boots: Hunters // glasses: BonLook* // mittens: self-made, pattern here // headband: self-made, similar pattern here // legwarmers: self-made, pattern here

*This is an affiliate link, which means I may get compensated if you decide to shop at BonLook. You won’t pay more by clicking through my link and you’ll be helping to keep peneloping.com running! :]

 It’s snowing!!! I wasn’t planning on taking photos today but I’d been meaning to post this sweater and the snowflakes were so fat and glorious I couldn’t resist.

Anyway, this post is a four-in-one! As I was getting dressed I started thinking about before I started knitting and I have no idea how I ever survived winters. Granted, I lived in California where “winter” really has to be put in quotes, but I do remember constantly being cold. Thank god for wool.

When I came across this pattern I absolutely loved how the sample garment looked and decided to go with the suggested yarn in the exact colorway they used. I never in a million years would’ve picked this one off the shelf but the end result is so cool! This is what it looks like on the skein:

CIMG2252Where does all the purple come from??? It’s like magic.

I forgot to photograph them but the pattern also includes lined pockets which I did in a solid purple wool. Super cozy to stick frozen fingers into. Anyway, I made a few adjustments to the pattern which you can find on my Ravelry page. After trying out all kinds of button styles I decided that toggles were the cutest. I got mine at the sadly now-closed Windsor Button in downtown Boston.

The mittens are the Give a Hoot pattern, which I shortened to be fingerless. Other than that it’s a solid and straightforward pattern that I highly recommend, especially for impatient beginners. The Leg Warmer pattern by Jane Richmond is magical and super simple, and I actually recently bought yarn to make two more pairs. I think for my next pair I’ll do contrasting colors, with a marine blue tweed on top and a mustard tweed on the bottom so that I can flip them upside down depending on what color I’m in the mood for.

And finally, the Braided headband pattern is one of my favorites for winter. I don’t always like to wear my hair down and it’s nice to have an ear-covering option that allows for updos. I made some major adjustments to mine (actually the only thing that’s the same is the actual cable lol) and I realized after trying to recreate it from my Ravelry notes that my Ravelry notes make absolutely no sense. Ignore those. I’ll rewrite one that’s not gibberish soonishly.

Sidenote: If you want to pick up a pair of Hunters, they’re currently available at Costco at 50% off the retail cost!


Shiny!

Classic stunner dress copycat Classic stunner dress copycat Classic stunner dress copycat Classic Stunner dress copycat Classic Stunner dress copycat Classic stunner dress copycatdress: self-made, based on this // shoes: Seychelles // glasses: BonLook* // coat: thrifted // tights: Modcloth 

*This is an affiliate link, which means I may get compensated if you decide to shop at BonLook. You won’t pay more by clicking through my link and you’ll be helping to keep peneloping.com running! :]

So the plan was to grow out my bangs and possibly revert to being a brunette. That was the plan, anyway. My bangs were around cheekbone length (and super annoying) and my roots were getting to that gross “something needs to be done immediately” point and I even had a box of brown dye sitting on my desk. Except then somehow I ended up with blunt bangs and even redder hair. I usually just use Garnier Nutrisse in light intense auburn, except this time I decided to use one of the blonde shades on the bottom half and then the auburn over everything to see if the bottom would end up a bit lighter. I can’t really tell if the blonde made a difference at all but just having a head of freshly dyed hair feels amazing.

I’ll be honest though, the bangs were 80% because my eyebrows were starting to look like caterpillars trying to mate and for some reason hacking at my hair was easier than dealing with unruly eyebrows. My eyebrows are still out of control.

Anyway, I made this dress more than a year ago for a fancy party and it’s sort of been forgotten ever since. I haven’t really worn it because I wanted to make small adjustments to the waist area but keep forgetting about it until I actually want to wear it. I absolutely adore this fabric. I spent ages trying to find something similar to the original dress but purple, black, and silver impressionist semi-floral blobs is not exactly an easy print to search for. I kept running into this fabric at the store and finally decided that it was probably the closest thing I’d find. It’s super thick and holds the pleats really well.

I used Simplicity 1873 (again!) but with some adjustments to the neckline area. I wanted it to be more of a boat neck so I widened the neckline and then scooted the shoulders outwards a bit. Then I cut the back so it would form a V-shape.

I think I’ll whip this one out for Christmas this year!

PS If you’re in Boston, come celebrate Stitchmas at Grey’s this Saturday! Details on Sarah’s blog.

PPS It snowed!!!

Red Riding Hood, or That Time I Knit a Sweater in One Day

Woodland Hoodlet

Woodland Hoodlet

Woodland Hoodlet

Woodland HoodletWoodland Hoodlet

Woodland Hoodlet

Woodland Hoodlethoodlet: self-made, pattern here // dress: self-made, blogged here // tights: Modcloth // top: Banana Republic

First of all, totally unrelated to anything but holy crap the Doctor Who special was amazing. I was a mess. I kept tearing up the whole time and then toward the end I completely lost it.

Anyway, how cute is this little hoodlet?? It’s not the most practical garment but who cares about practical when there’s giant smooshy cables and bobbles and a huge hood complete with a tassel?? I love. In fact I’ve been lusting over almost every tiny owl knits pattern for a few years now and bought her book as soon as I realized it existed. Twenty-one adorable animal themed whimsy knits? Yes, please!

I had originally planned on doing this in a cream color, or something ashy, but then I was perusing the Ravelry page for it I saw one done in a dark red that was absolutely gorgeous. And then I realized I still had a bajillion skeins of a dark red chunky yarn that I had planned on using for a different project but that would be perfect (whoops, sorry Aidez..). I started knitting around 1pm and finished it at 1:23am. I can’t even begin to explain how much my hands hated me after that. Especially when I woke up bright and early the next day to start working on my Stonecutter. Sorry hands.

I had read on someone’s Ravelry page that they had wet-blocked this and lost all the chunky texture from the cables, so instead I put it on my dress form with a towel stuffed underneath to make it a more bulky shape, and then just sprayed generous amounts of water on it from a spray bottle. I most just wanted the stockinette to smooth out a bit and for the whole thing to lengthen a bit and was hoping gravity would help with that.

Now that I’m looking at the photos again I’m noticing one giant cable on upper row and I have no idea how that happened. I kind of love the mismatched effect but I’m 95% sure that was a mistake. Oh well.

I hope everyone has a fantastic Thanksgiving! I’m going to be curled up in this hoodlet and comfy pajamas and watching movies all weekend with Boyfriend and Stonecutter.