Mary poppins

Wax canvas tote bag

Wax canvas tote bag

Wax canvas tote bag

Wax canvas tote bag

Ever since I started to discover that things I had once thought were impossible (jeans, bras, jackets, etc.) were actually totally within the realm of possibility, I’ve wanted to make a bag. I did make one bag a while ago that was cute but not exactly practical for my lifestyle (i.e. too small). Most of the bag patterns I’ve come across online have either not been the style or type of bag I was looking for, or are entirely too Amy Butler-y, which doesn’t go with my wardrobe at all.

I randomly came across this pattern/tutorial/guide thing a few years ago and pinned it and promptly forgot about it. I ran into again the other day and remembered that I had a bunch of canvas, wax, faux leather and pretty Cotton and Steel horses that were just waiting to be made into a bag. (It was originally supposed to be a Walden Cooper bag but I decided I’m really not a backpack person.) The canvas was from fabric.com and the faux leather was from that giant warehouse of fabric shops in Taiwan, and the wax I randomly found at Goodwill one day. I’ve heard great things about Otter wax too.

Now, I’ve never worked with waxed canvas before and I still don’t really feel like I know what I’m doing, especially since I was waxing my own canvas. I did the rubbing in paraffin wax thing and then melted it with a hair dryer, but then the iron would basically make it evaporate or otherwise disappear. I ended up deciding to wax most of the fabric (once cut), ironing it carefully with a press cloth and on a low setting, and then just reapplying wax at the end as needed. It seemed to work well. I also did a light layer on the inside to protect the pretty horses.

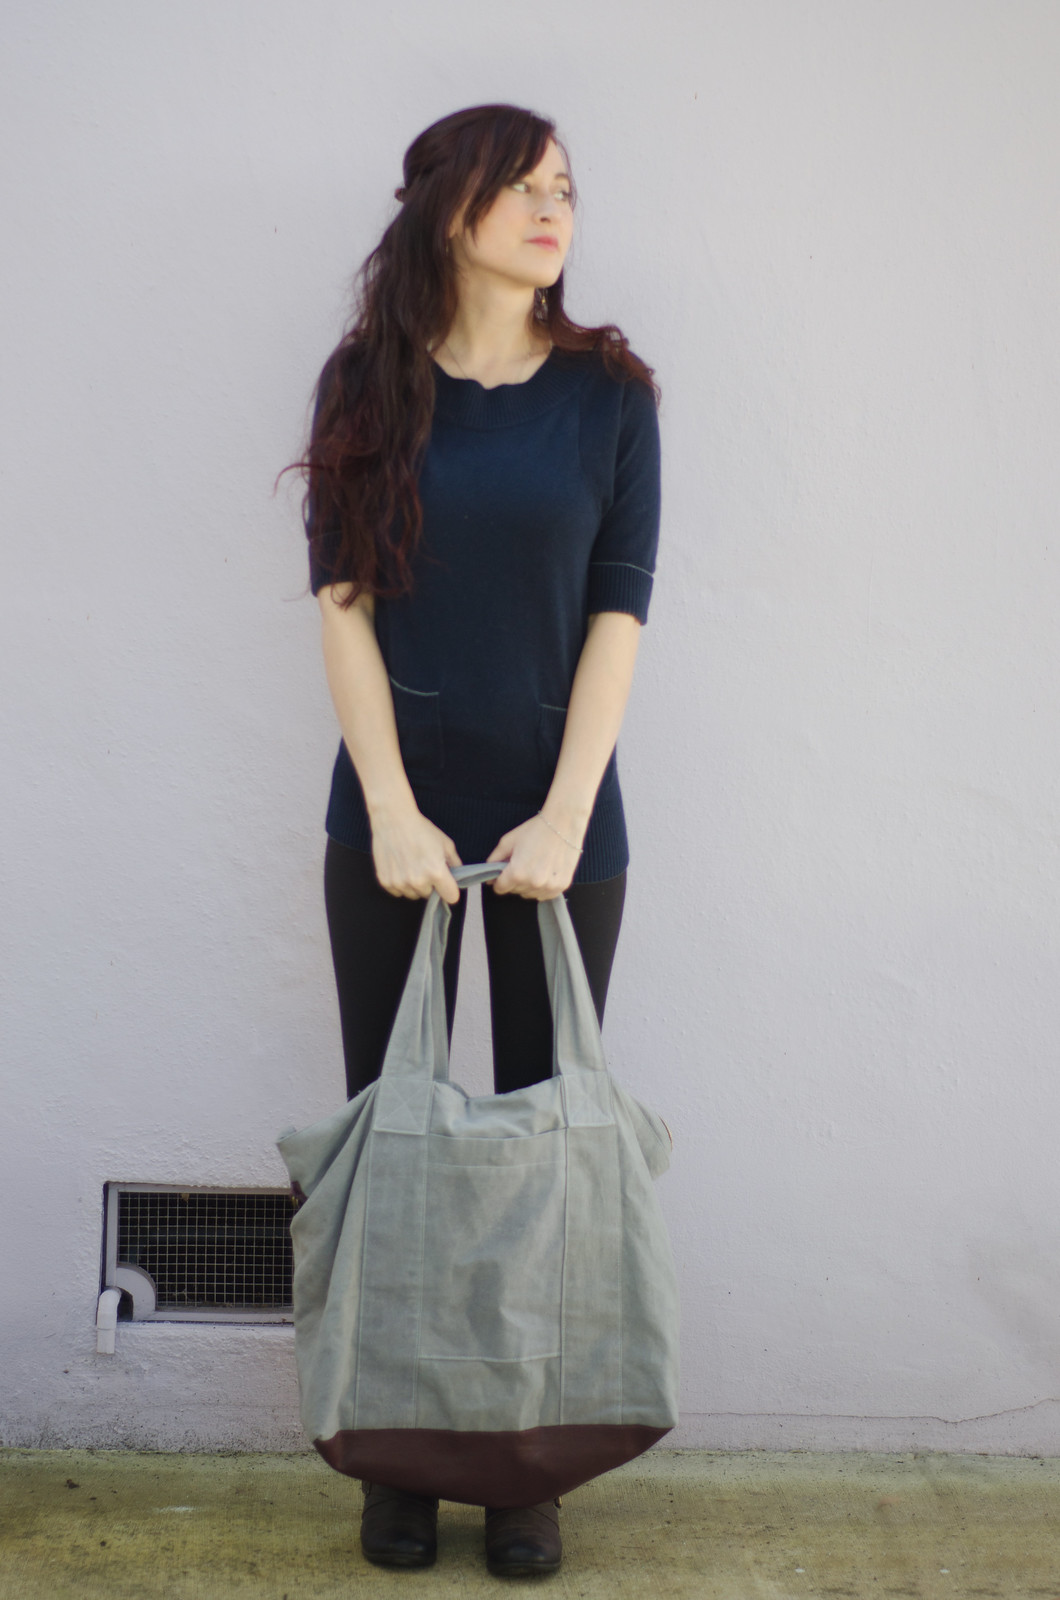
The inspiration bag.

Onto the pattern/tutorial/guide thing. Fun fact: it’s written by Don Morin, who has a Craftsy class on leather bags that looks pretty interesting. Anyway, the instructions are a bit confusing and there aren’t any step by step photos but if you read through carefully and just look at some bags you own/photos of the finished bag it’s pretty straightforward. I also found this blog post of someone who made it and shows some of the steps, which was helpful. The main confusion is the fact that his finished photo is of the RTW bag that was his inspiration, and not an actual bag made with the pattern, so there are some differences.

Wax canvas tote bag

I also changed a few things due to preference.

1) He has you cut two struts for each side (the vertical things that extend down from the strap). Based on advice in the blog post I linked above, I cut two extra long ones so they wrap around the bottom of the bag for support.

Wax canvas tote bag

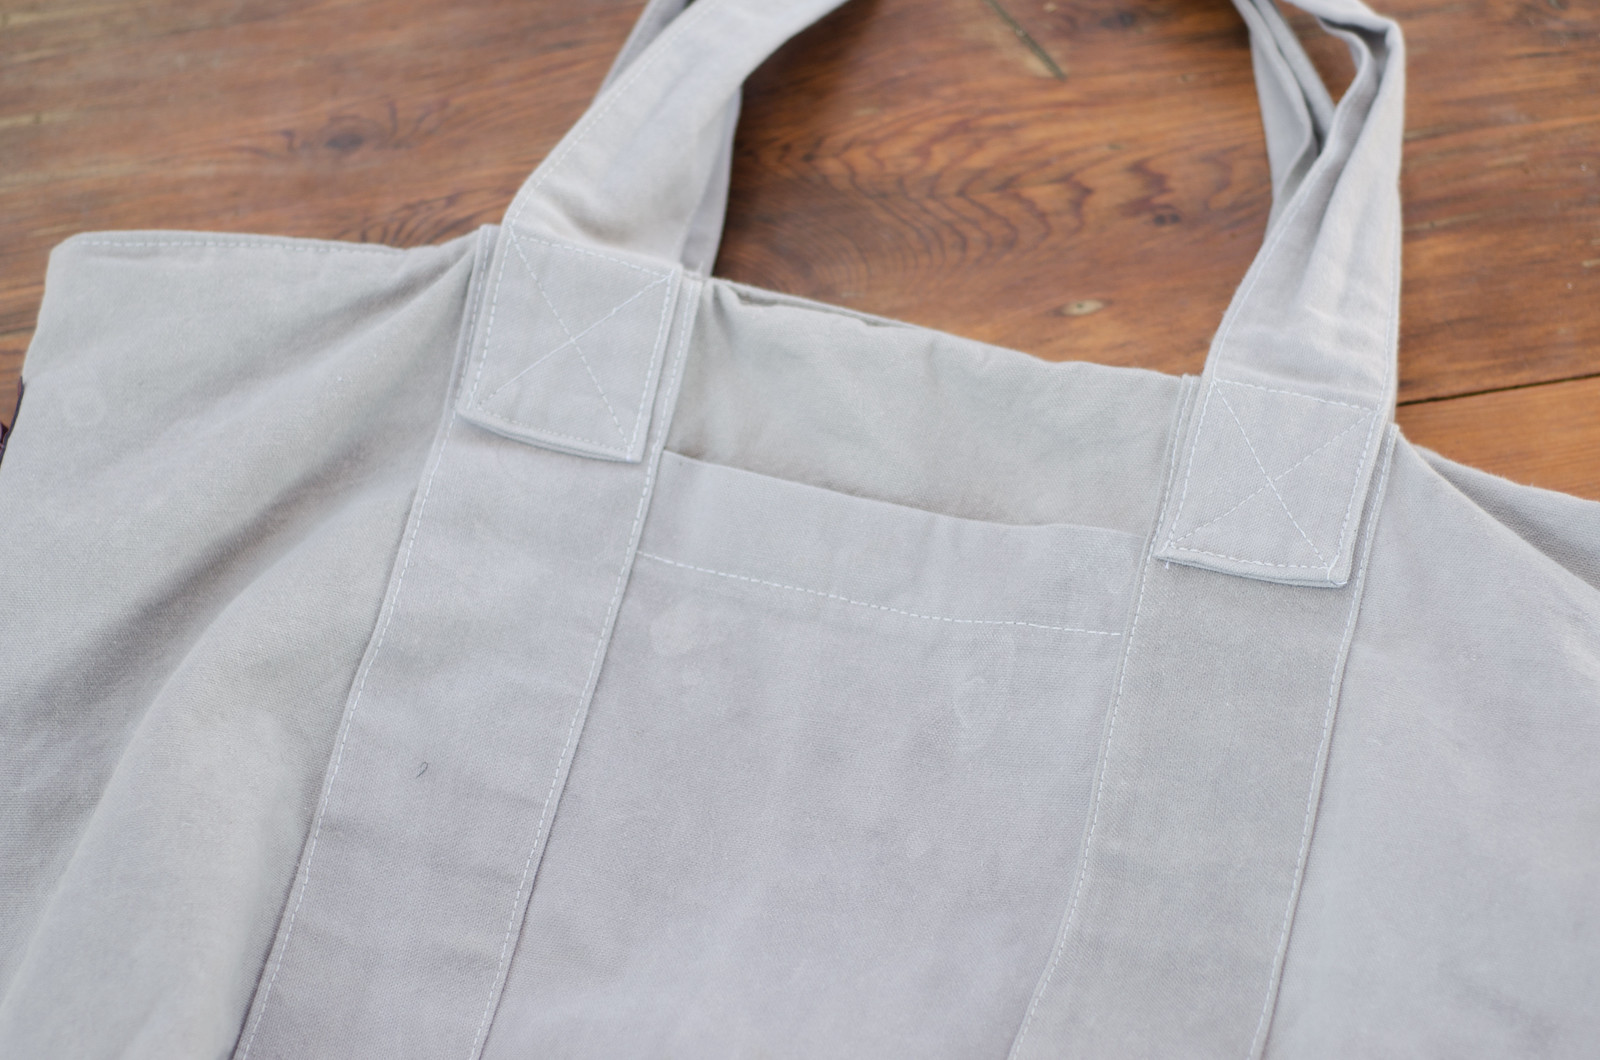
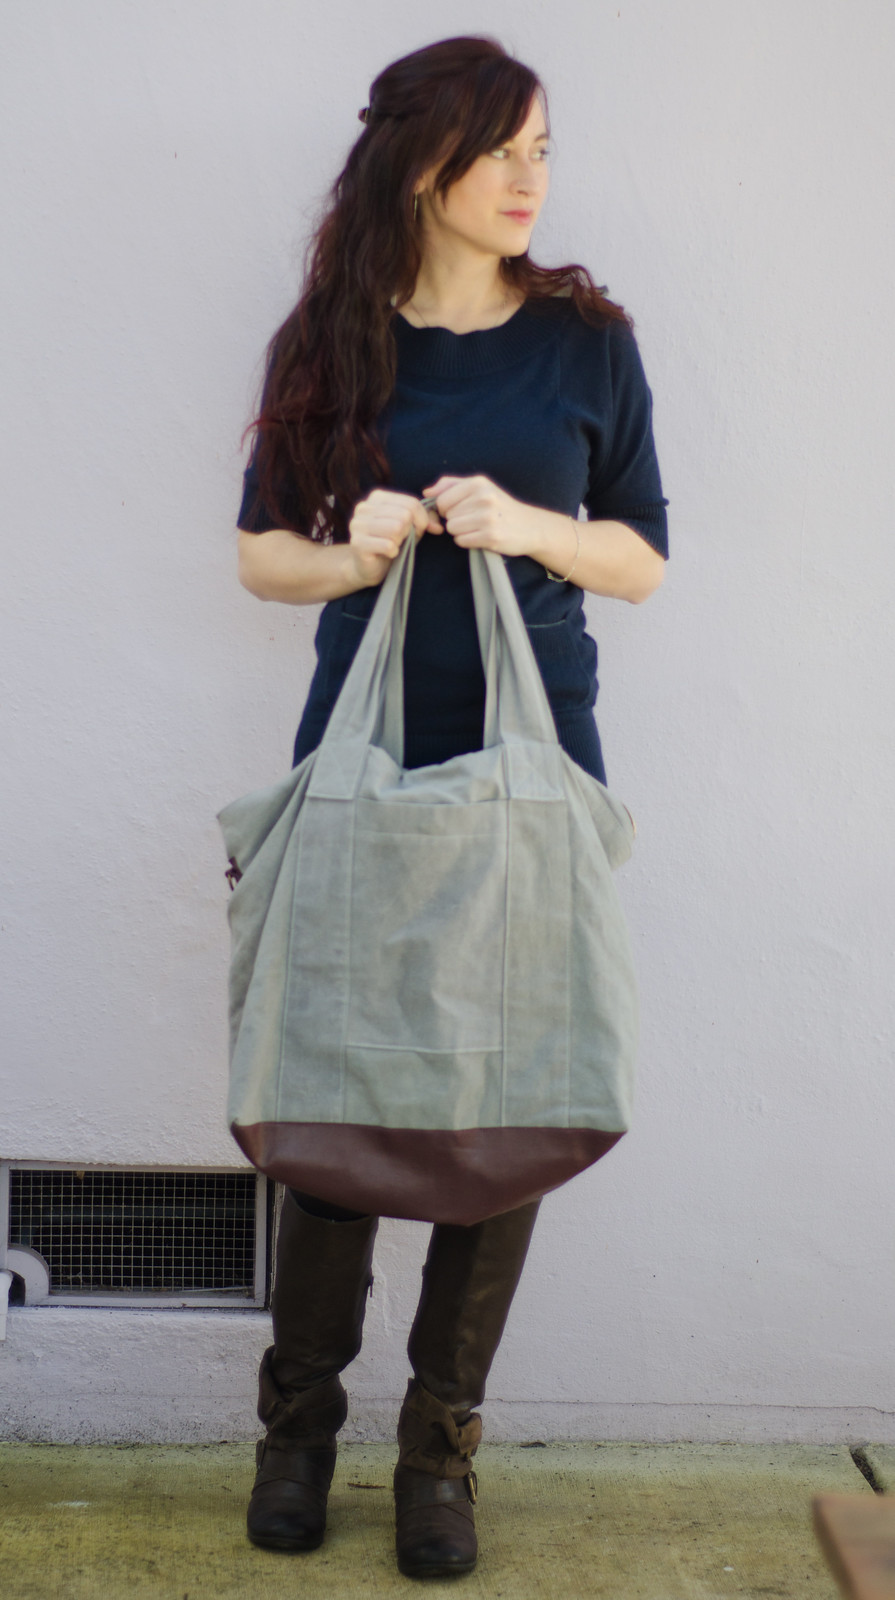
2) I thought his straps were too thin so I doubled the width, as well as the length so they can be worn over the shoulder. I also didn’t bother sewing the leatherette trim on because holy crap that looked fiddly.

3) I added a lining, which basically just entailed cutting a second main bag piece. I also had to cut additional zipper placket pieces and then had to fiddle with the zipper insertion so I think mine ended up being a little different than what his instructions said to do.

Wax canvas tote bag

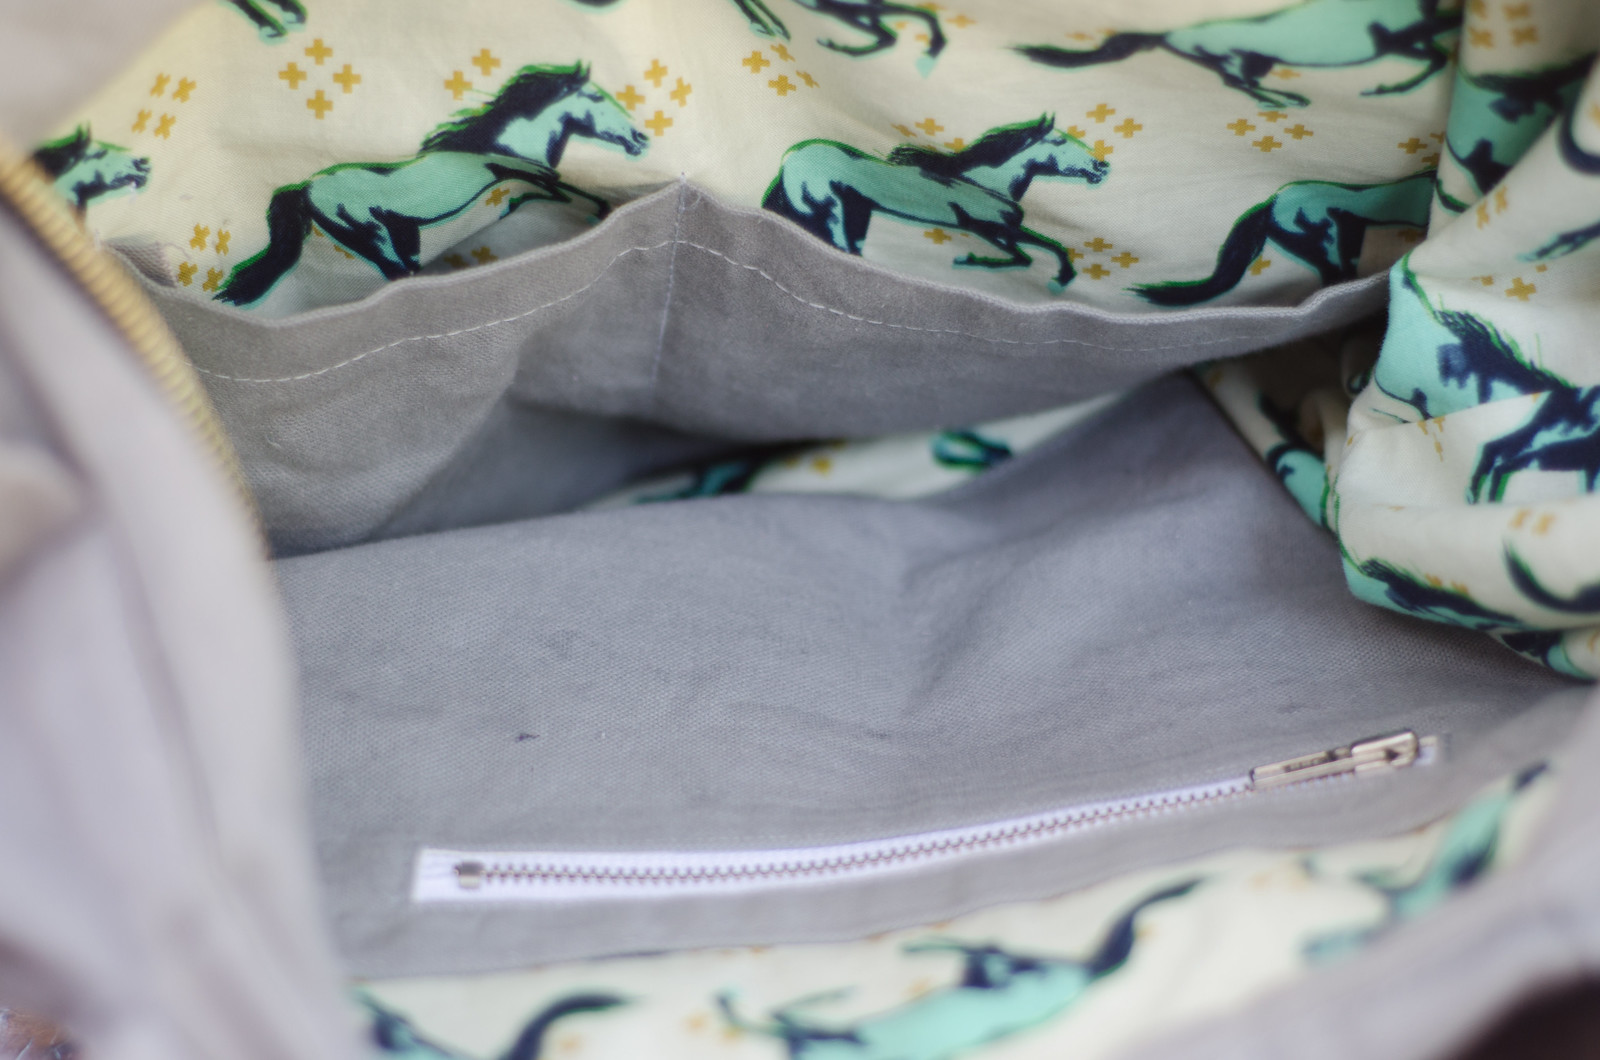
3) I added a zippered patch pocket (basically just make a window in a rectangle of fabric like you’re going to do a welt pocket but then sew a zipper there and then sew it on like a patch pocket) and some open pockets on the other side. I interfaced the crap out of the lining and then just sewed it on easy peasy.

Tote bag details

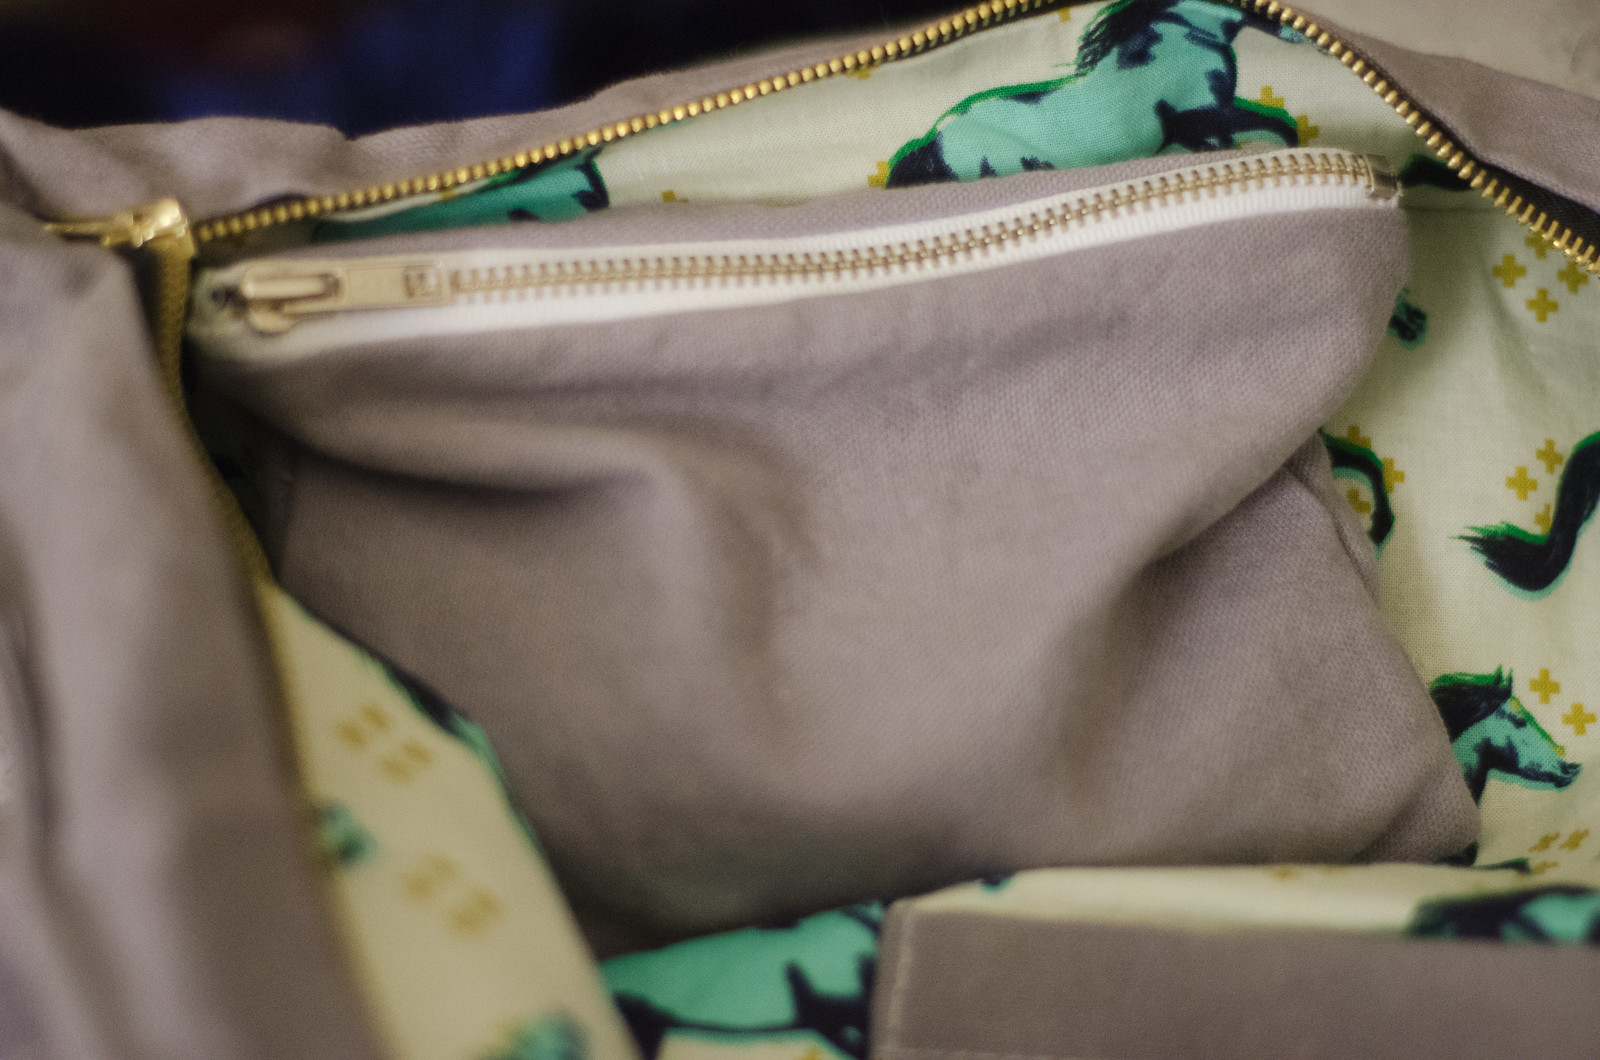
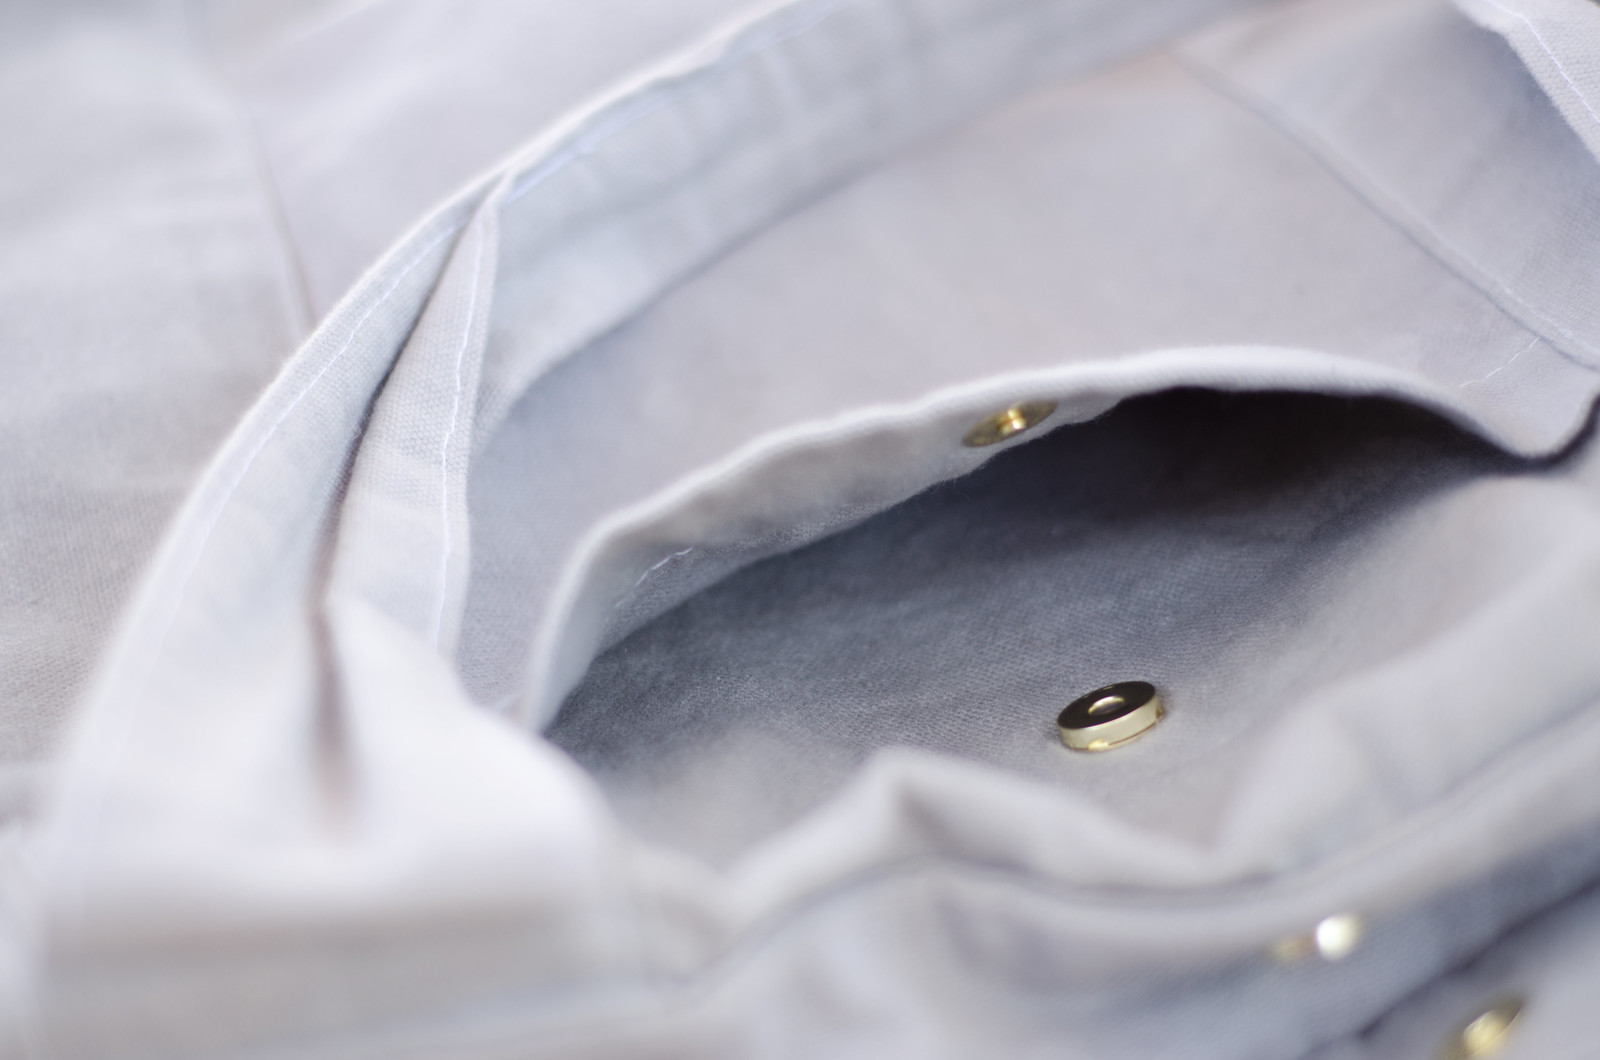
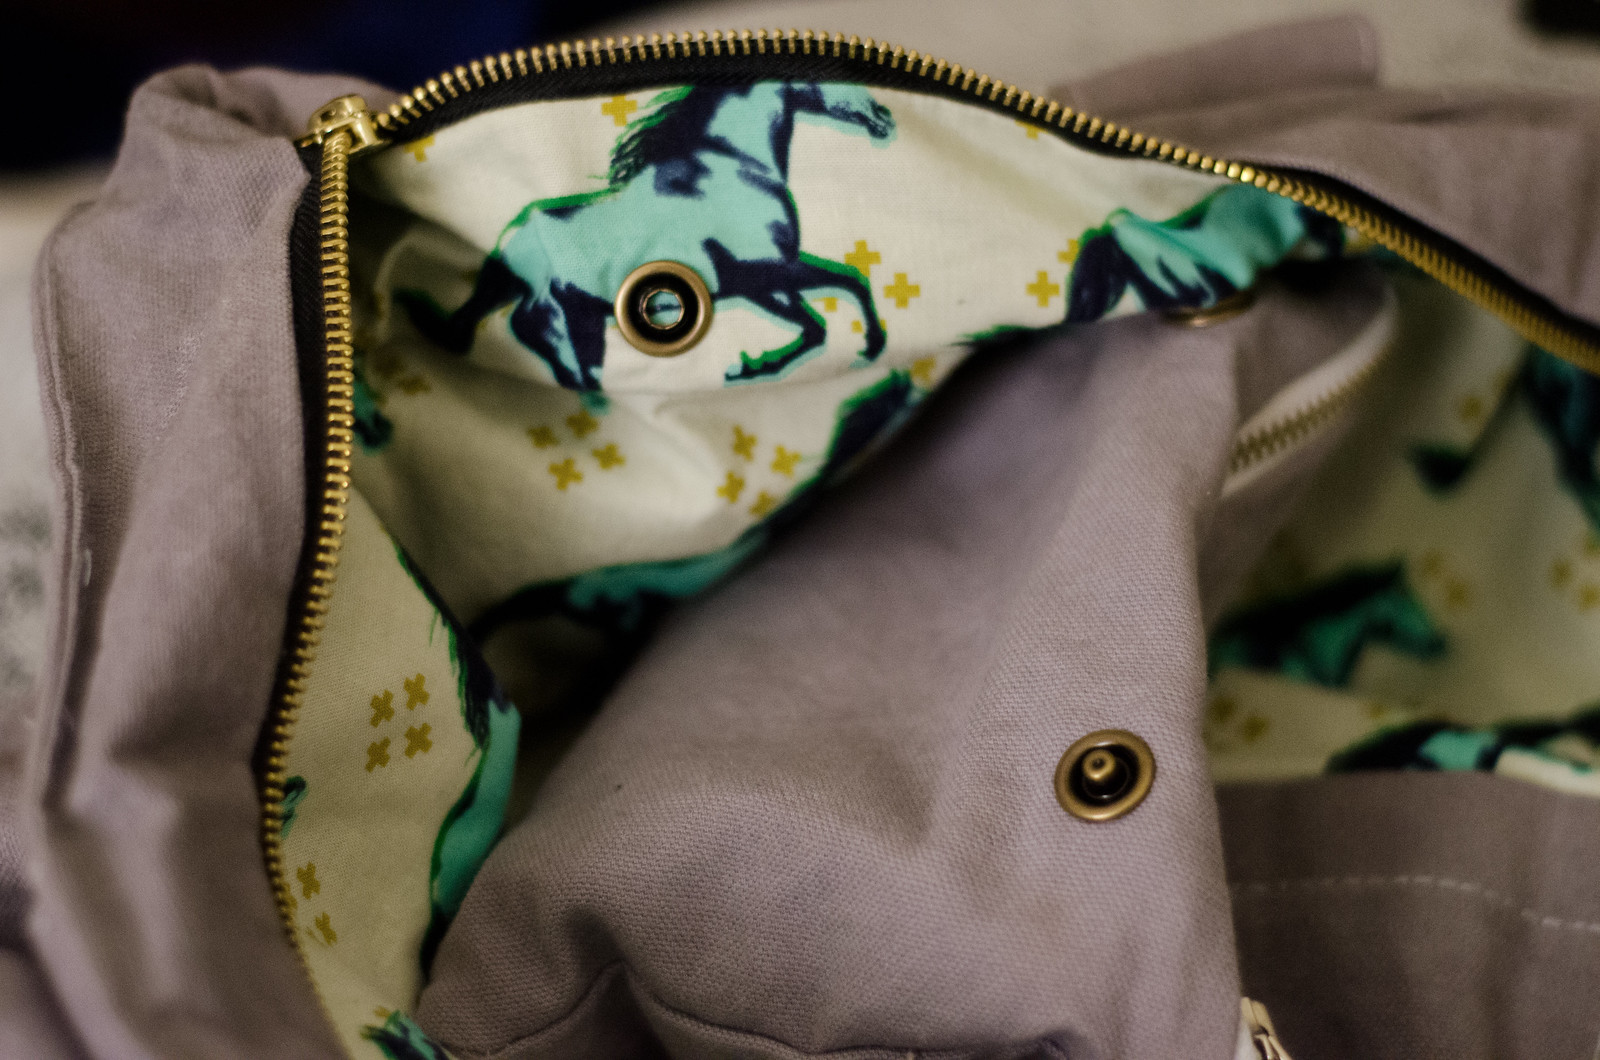
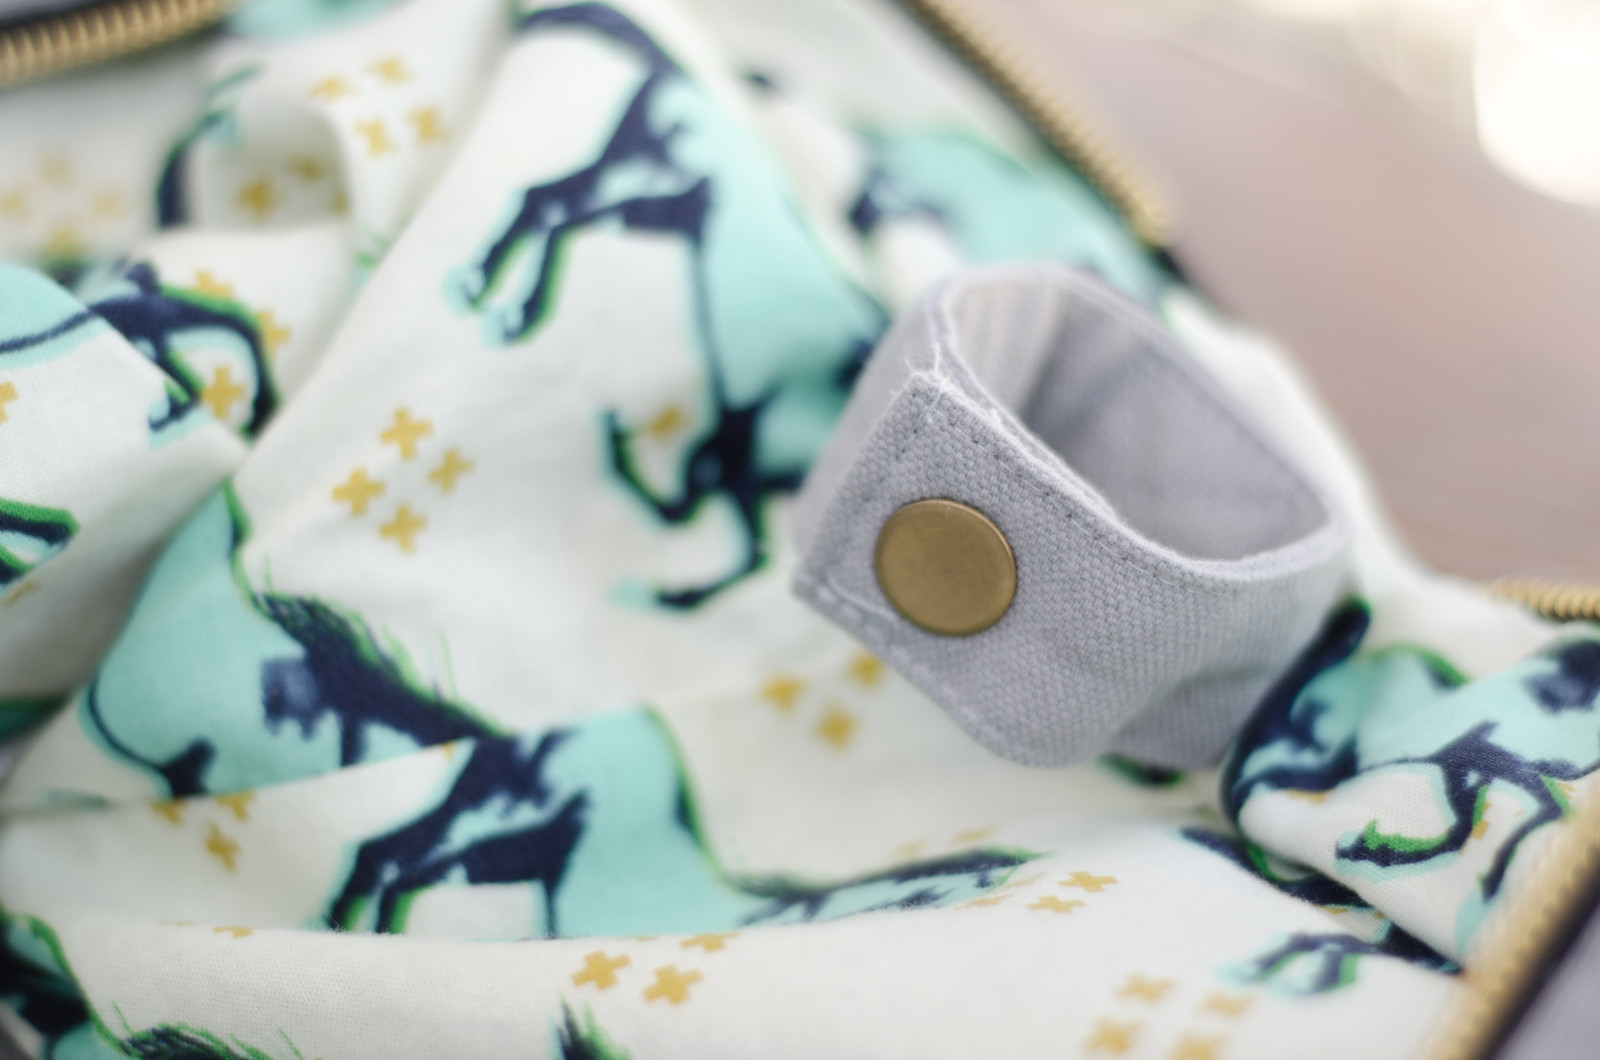
4) I stole this idea from my Jordana Paige knitting bag because I love it so much, but I made a zippered pouch but attached snap buttons on the side, and then the other side of the snaps are on the inside edge of the bag so the pouch doesn’t get lost in the bottom of the bag but is also removable. (I use this pocket in my knitting bag for makers and needles and needle tips. This one holds Ibuprofen, tampons, chapstick, and ladybug bandaids.)

Tote bag details

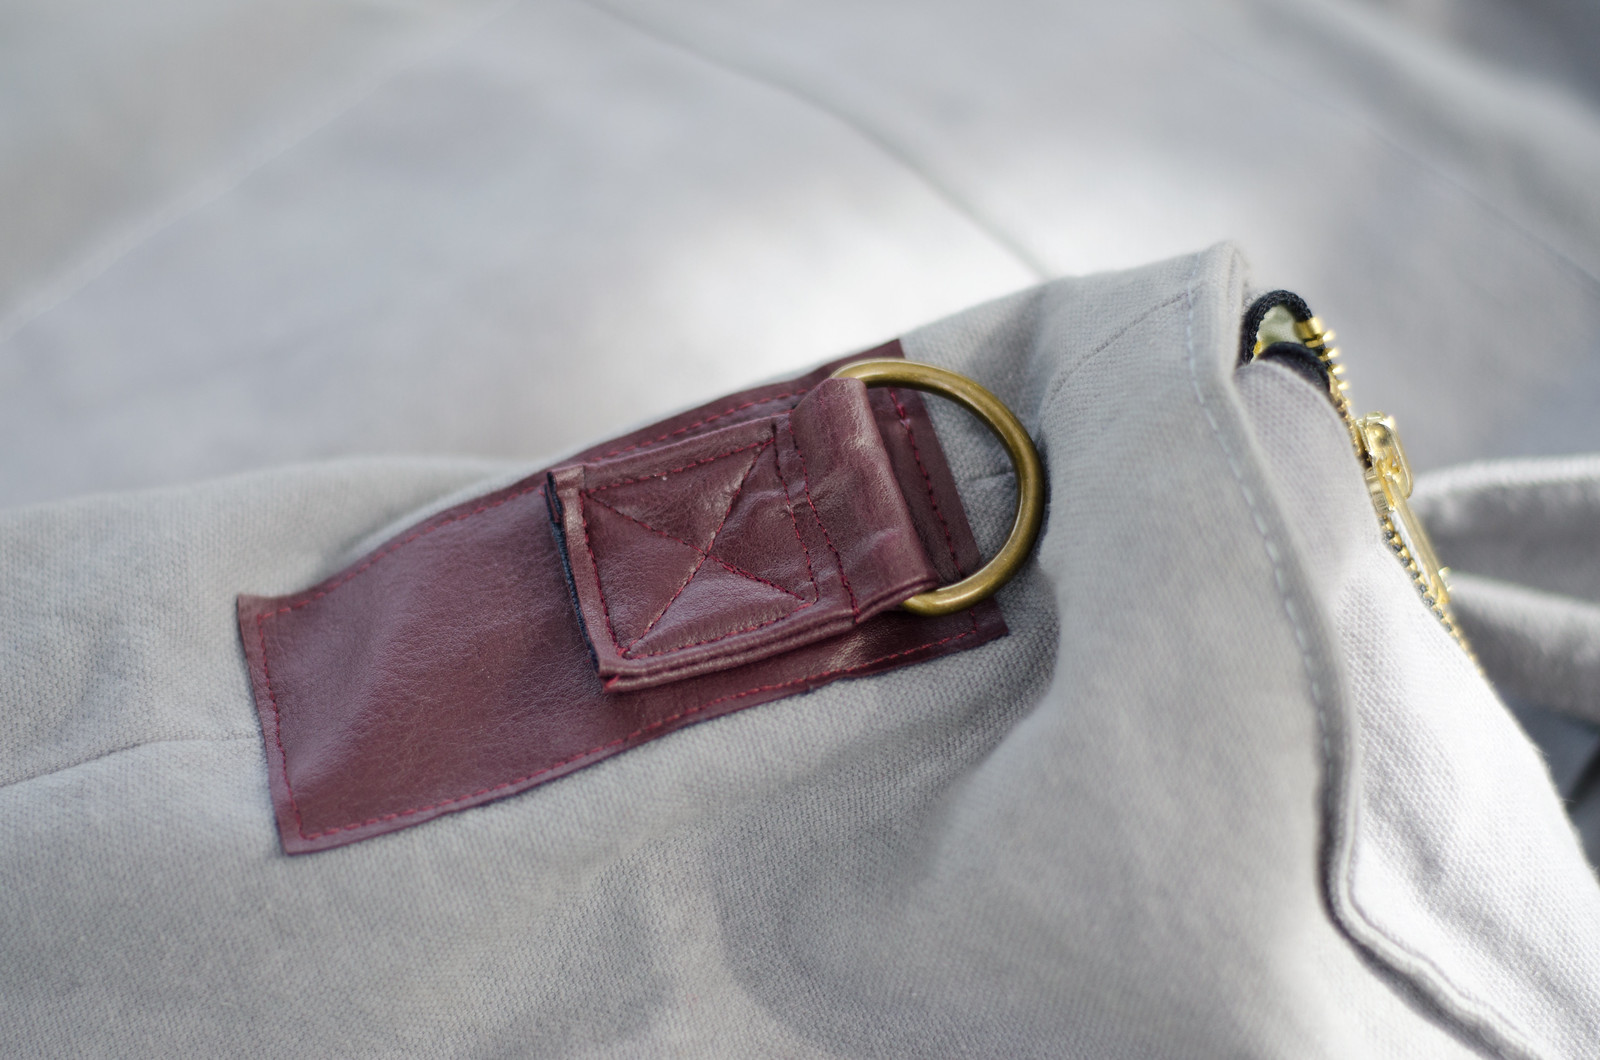
5) Also stolen from my Jordana Paige bag: I added a snap loop thing either for hanging my keys or for feeding yarn through if I want to knit out of the bag. I realized afterward that I should’ve made a elastic top pocket thing to actually hold the yarn but I think I can still go back and handstitch one in.

Wax canvas tote bag

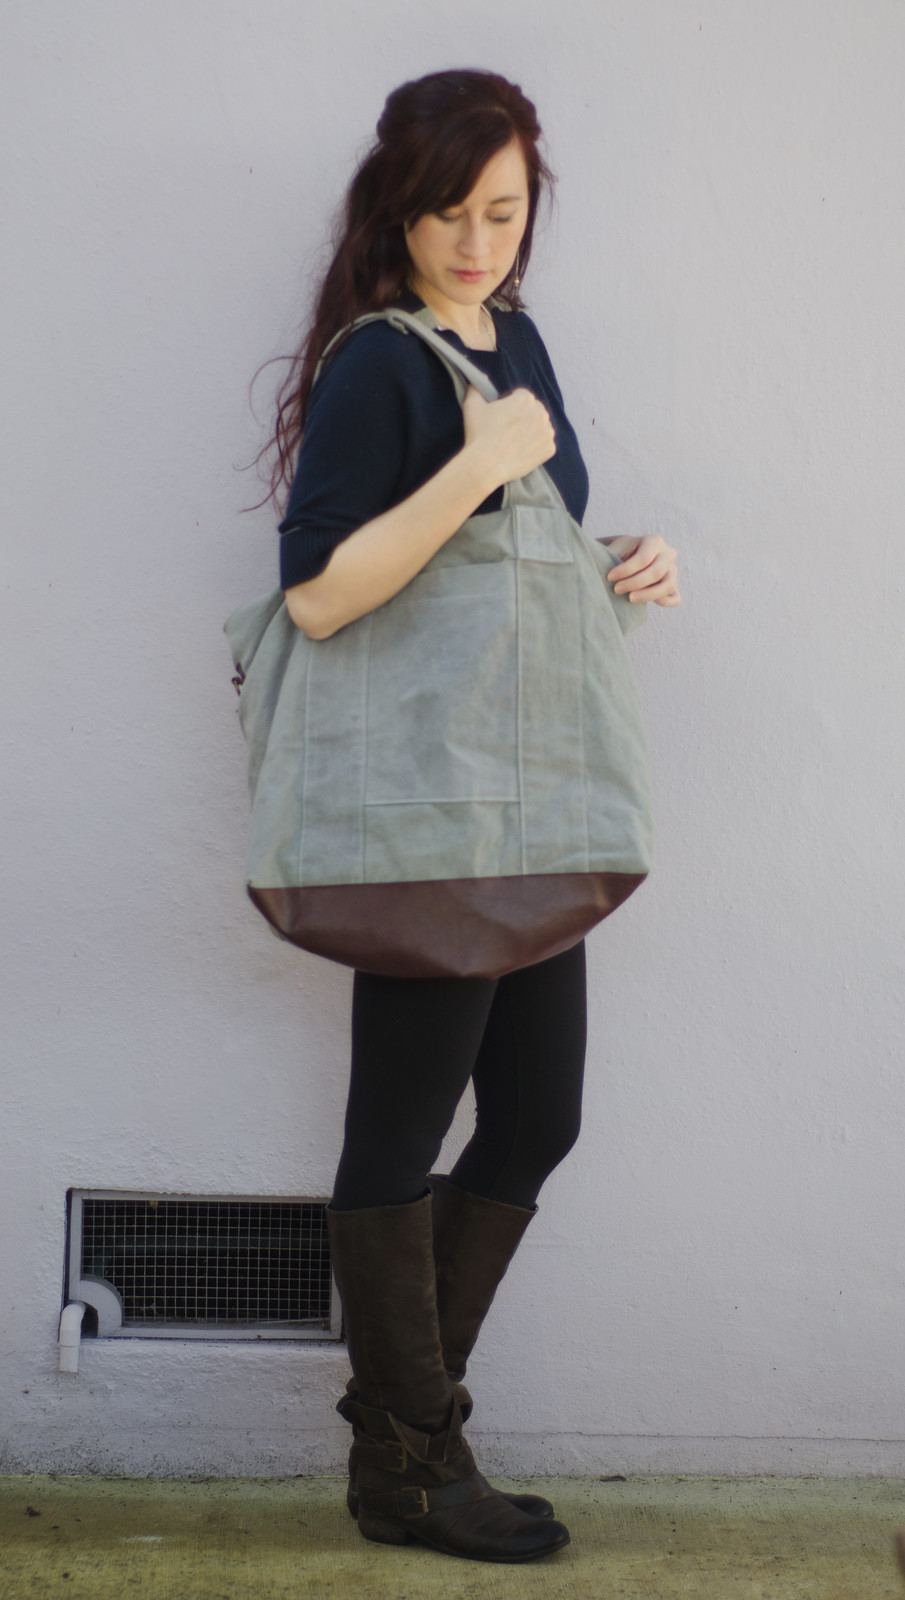
6) I also haven’t done the strap because I can’t decide if I would ever wear it that way. I did sew on D-rings just in case I change my mind though. Instead, I elongated the straps so it can comfortably fit on my shoulder.

Tote bag details

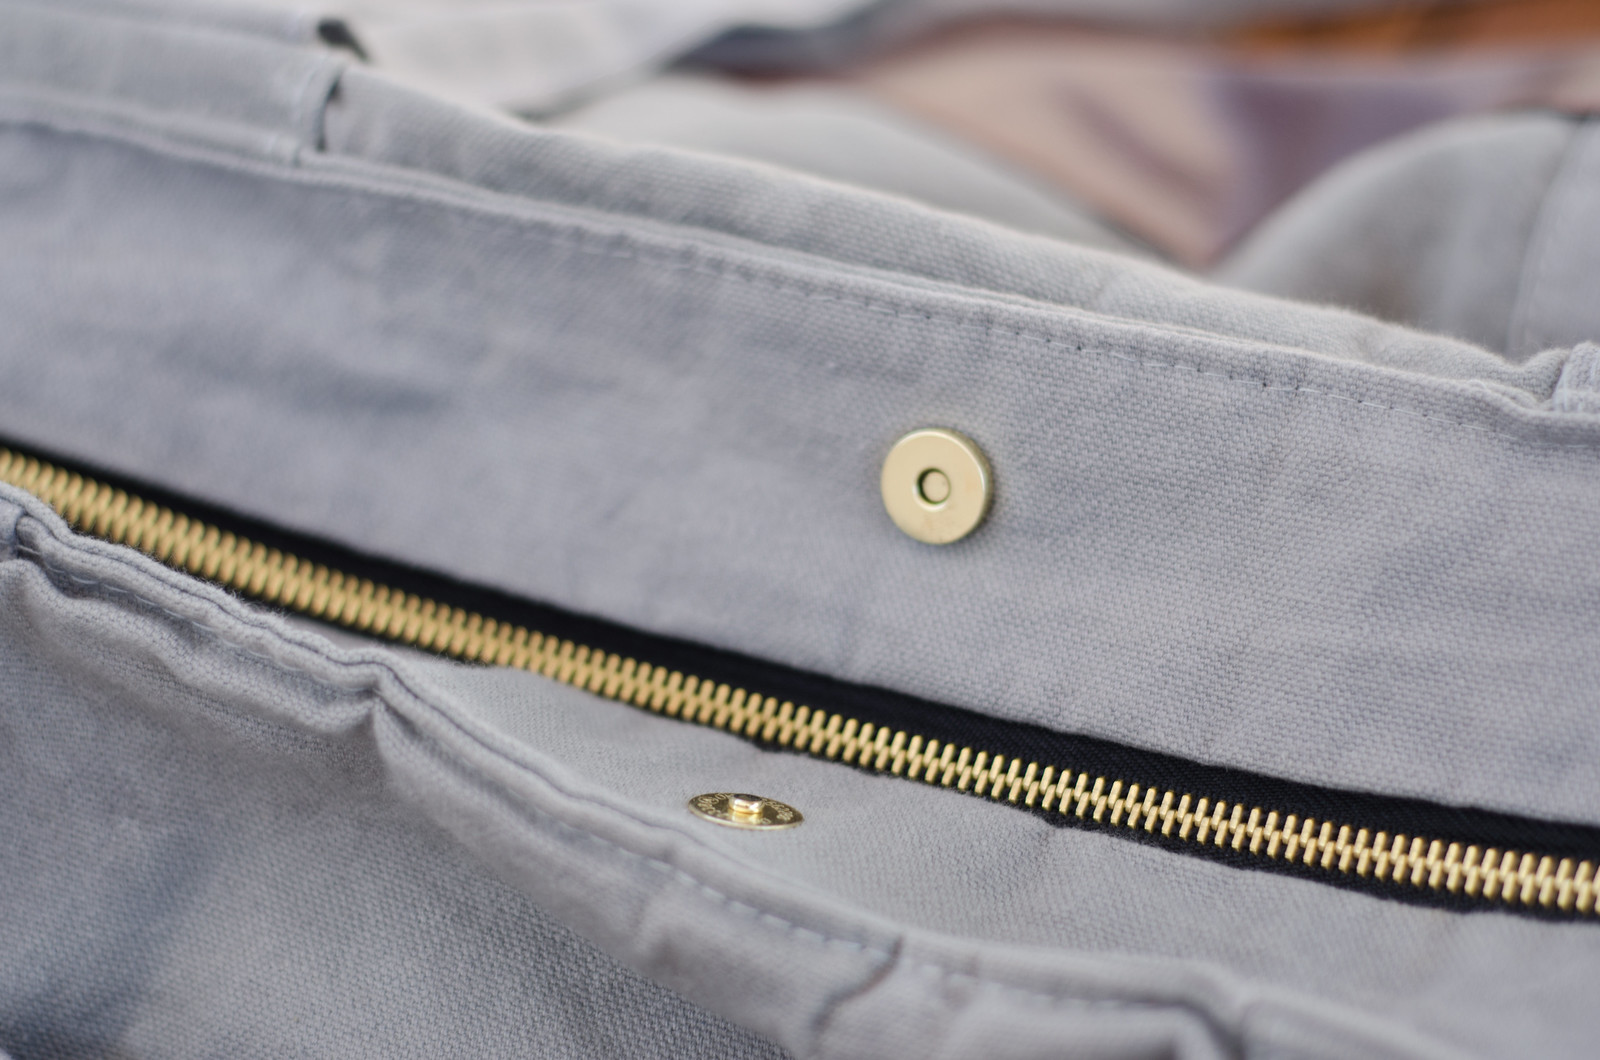
7) I don’t always zip my bags but don’t want the giant opening flapping around either so I added a small snap button in the middle.

Wax canvas tote bag

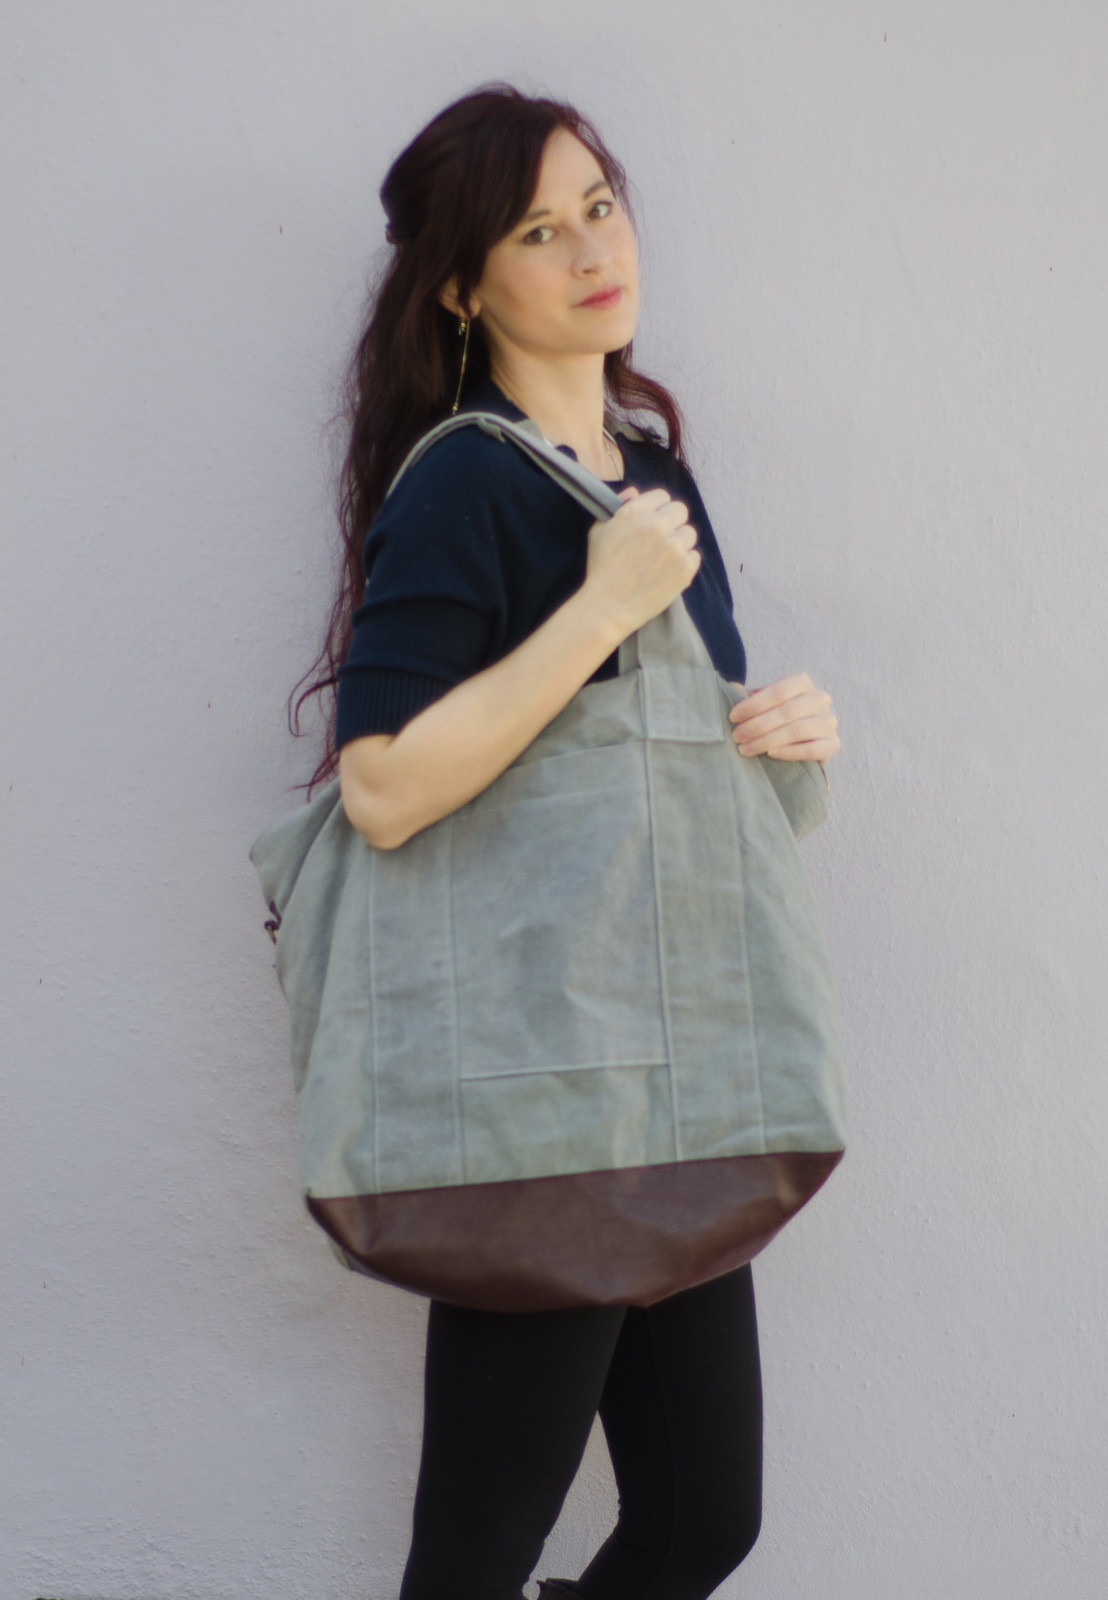
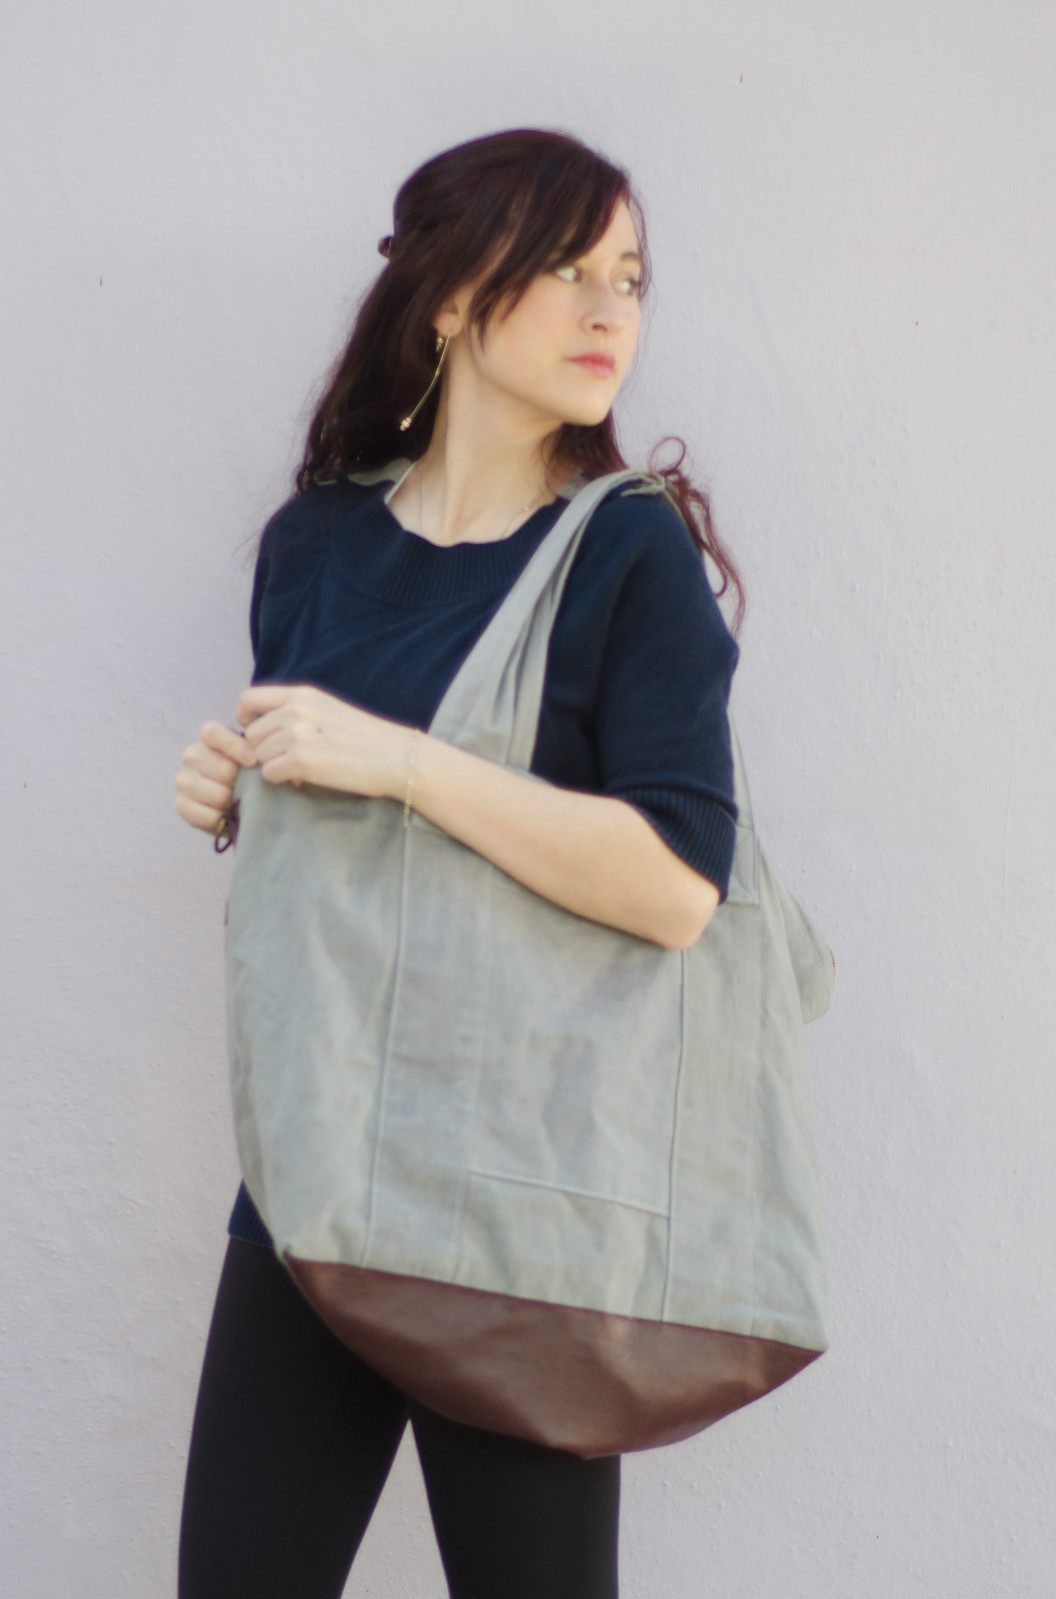
Anyway, I looove how it turned out. It’s so heavy and sturdy and lovely and then you look inside and it’s horses. Major heart eyes. I didn’t expect it to be quite so ginormous (I guess the fact that he calls it a “Weekender bag” didn’t tip me off..) but that means it’ll be nice for either weekend trips or just stuffing multiple knitting projects into.

Wax canvas tote bag

(Now I really want to sew another camera insert..)

Snoqualmie

Snoqualmie

Snoqualmie

Snoqualmie

Snoqualmie

Snoqualmie

Snoqualmiecardigan: Snoqualmie by Michele Wang, pattern here // shirt: Grainline Archer, pattern here // legwarmers: pattern here

Snoqualmie is done!

(Semi-related: I’m pretty sure every single time I’ve typed “snoqualmie” it’s come out “snog.” Every single time.)

Anyway, I did this one for Heather’s Snoqualmie Knit-along last year. I started knitting it sometime in March, got caught up in end of the semester projects, and then it was summer and I was sweating too much to hold a pile of wooly cables in my lap. I picked it back up a few weeks before finals week of fall semester as stress knitting. And in fact, since it was my first semester of a full class load (plus work, plus I’d just started my internship), there was a lot of stress knitting and I actually accidentally finished it the week of finals. Oops.

I love everything about this pattern (I also love everything about Michele Wang). I wear this sweater ALL the time. The only issue I have with it is that I used Lion Brand Fisherman’s Wool because it’s on the cheaper side and it’s  usually knitted up pretty nicely before. This time it’s pilling like crazy. To be fair, I am wearing this sweater pretty often, but still. It seems a bit excessive. It’s such a comfy oversized boyfriend blanket of cabley goodness that I could totally see knitting a second one. I’ll have to try a better yarn next time and see if it makes a difference.

I struggled a bit with figuring out what kind of buttons to put on this one. It’s a pretty hefty cardigan so I wanted over-sized buttons, but the ones I tried first were a similar toggle style made of some kind of plastic or resin that was much heavier and pulled one side down too much. A friend gave me these lovely wooden ones that are super lightweight and exactly the size and style I was going for.

I knitted a 41 1/2 size (the second smallest size) and while I love how giant it turned out, I might size down or re-check my gauge on the next one just for variety. I like that I can pop this one on over leggings or a dress, but it might be nice to have a slightly more fitted one for wearing with jeans and a t-shirt. I’m also considering adding some grosgrain ribbon or bias trim to the inside of the button plackets and maybe around the back neckline edge for extra support. Does anyone have experience with this? I’ve seen it on RTW sweaters but haven’t actually tried it on anything I’ve knitted.

Now excuse me while I go snog this sweater. I mean snuggle.

brocade + bonus meowser

Pleated brocade skirt

Pleated brocade skirt

Pleated brocade skirt

Pleated brocade skirt

Pleated brocade skirtMy feline friend came to visit while I was taking photos hehe. 

I actually made this skirt ages ago but it’s taken me forever to photograph it. I picked this fabric up at a rummage sale for something like $3. At first it was going to be some kind of zippy crop top, possibly with a peplum. Then I decided I would probably never wear that and fell down the rabbit hole of brocade skirts on Pinterest. Then it was an issue of whether it should be a Moss skirt, a pleated skirt, or something in between. I decided to go with the pleats.

It’s pretty basic, really. The Armstrong book talks about all kinds of technical shenanigans for making pleats but to be honest, I just measure out a waistband in the right size and then fuss with the pleats until they fit the waistband. The result is probably not quite as neat as it could be, but meh.

Helpful pleating tip: regardless of whether you measure out your pleats ahead of time, try to angle them so the inside fold of the pleat sticks out past the edge of the fabric. This keeps them from splaying open and keeps them nice and neat.

The top is actually a cropped Nettie top that I’m wearing backwards. It’s not technically meant to be reversible but I was getting dressed one day and the low scoop neck didn’t quite work with the outfit so I decided to try turning it around. The shoulders end up being slightly off but not really noticeably.

Now excuse me while I go pet the kitty who is currently indignantly meowing because I ignored him while I finished taking photos. (For the record, after that photo, he settled about halfway between me and the camera and licked his bits — out of view, thankfully.)

Adventures in drafting – overalls

Overalls

Overalls

Overalls

Overalls

Overalls

Overalls

Overalls

I was sooo sad when my pants drafting class ended. Huge sad face.

The class was taught by Lynda Maynard (who also taught the Copying RTW class I took over the summer) and it was so much fun and I feel like a master of crotch fit now. That sounds dirty. But then again, so did most of the class. We used Suzy Furrer’s book* and drafted from our own measurements, and then it was just making muslins to tweak the fit. The rest of the class consisted of taking turns putting on our muslins and standing on a table while the entire class investigated our lower halves and volunteers pinned out corrections. Super hilarious and super fun. I used my draft to make a pair of skinny jeans (more on these later) and then just because I thought it was hilarious that she included it in the book, I also drafted the overalls as my final project for the class.

*It’s weirdly super expensive on Amazon so I would check elsewhere first. I snagged my copy from my school bookstore for like $60. (EDIT — A reader helpfully suggested this link, where you can get it for $65 plus shipping. Thanks Anastacia!)

These overalls are SOCOMFY. I started off following Suzy Furrer’s drafting instructions but like most drafting books I’ve worked with, there are no construction details so I got really confused about the button facings and why there needed to be front and back ones of the same shape. I ended up kind of deviating completely from the book and basically just drafted a copy of these Madewell overalls.  I tried something new with the pockets and basically added a muslin lining and then attached them as patch pockets. I also used two strands of gray thread instead of topstitching thread (someone in my class did that and it looked really cool).

I actually really love them in a lighter wash so I’m thinking I might need to make them someday when these wear out because I’m not sure I needed a pair of overalls, much less two pairs. The fit is mostly spot on, I think they’re just a bit baggier than the leggings/tights/skinny jeans I’m used to wearing. I do think the bib is a bit long and I had wanted to add a front pocket but didn’t get around to it before class started. Whoops.

**If you live in the San Francisco Bay Area and want to learn the ins and outs of fitting your crotchal region, Lynda teaches this class every fall at Cañada. (She also used to teach a pants construction class here that I’ve been unsuccessfully campaigning for them to bring back.)


Adventures in drafting // christmas dress 2016

velvet xmas dress

velvet xmas dress

velvet xmas dress

velvet xmas dress

OHAI. It’s been a while.

I realized the other day that while I’ve alluded to certain things, I haven’t actually talked about anything life-related in a while. So here’s a life update in a  nutshell:

Last year I decided that my old career was not exactly panning out to be what I wanted (a lot of this had to do with licensing regulations in California, but that’s boring and not sewing-related).  At the same time, I had signed up for a flat pattern class at the local CC just to have something to do while I looked for a new job after moving from Boston back to California. Pretty much by week 3 of the class I decided I was going to need to switch careers.  The next semester I signed up for a full class load. Now I’m finishing up my last semester (well, technically I’ll have one last class next semester) while interning as a pattern maker for a local designer.

So, lots of changes going on in the last year! Spoiler alert: I love it.

Anyway, full time school + internship + part time job means not so much time for blogging, which I really miss. I have a whole pile of clothes I’ve sewn in the last six months that need to be photographed. I keep being hesitant to do it because it’s too cold outside. And then I remember I used to do this in Boston, in the snow, in 30 degree weather. I’m shivering just thinking about it. -_-

ANYWAY, now that we’re all caught up, meet this year’s Christmas dress.

The backstory is that my friend kept buying these gorgeous velvet dresses from Anthropologie, and then we planned a weekend holiday trip and decided one evening we would wear velvet dresses. So I got on Pinterest and looked for velvet dresses and found this lovely one by Holly Willoughby.

Making the pattern was pretty straightforward. Move bust darts to waist and turn them into gathers, neckline yoke thing, V-front cutout that meets in the middle, puffed sleeve with gathers that don’t go all the way to the armhole. Since I was using velvet and didn’t want to bother with a separate lining, I made facings for the front and yoke to make it easier.

I used a cheapy stretch velvet from Fabrics ‘r Us because this was kind of an experiment. We’ll call it a Christmas muslin. It actually wasn’t that hard to sew together. I basted the tricky bits but other than that the pile of the velvet sort of acted like velcro and it mostly stayed put. I used stitch witchery for the hem and sleeve edge to avoid having a row of stitching. It stays put and I just think it looks nicer.

The beading was super fun and so quick now that I have a beading needle. I didn’t even bother buying new beads. I’ve done so many beading projects in the last few years that I have an assortment of extra beads and the original dress didn’t seem to have any distinct beading pattern so I just used what I had.

Anyway, I do kind of wish the insides were a little prettier (I was kind of rushed because this was one of two finals week procrastination projects) but I’m in love. It’s one of the comfiest fancy dresses I own and I’ve already worn it twice. The velvet makes it look dressy but the stretchy means more room for feasting.

Maybe I need one in green too..


options_framework_theme Theme by NUDGE MEDIA DESIGN.