Scuba dress

Plaid scuba dress

Plaid scuba dress

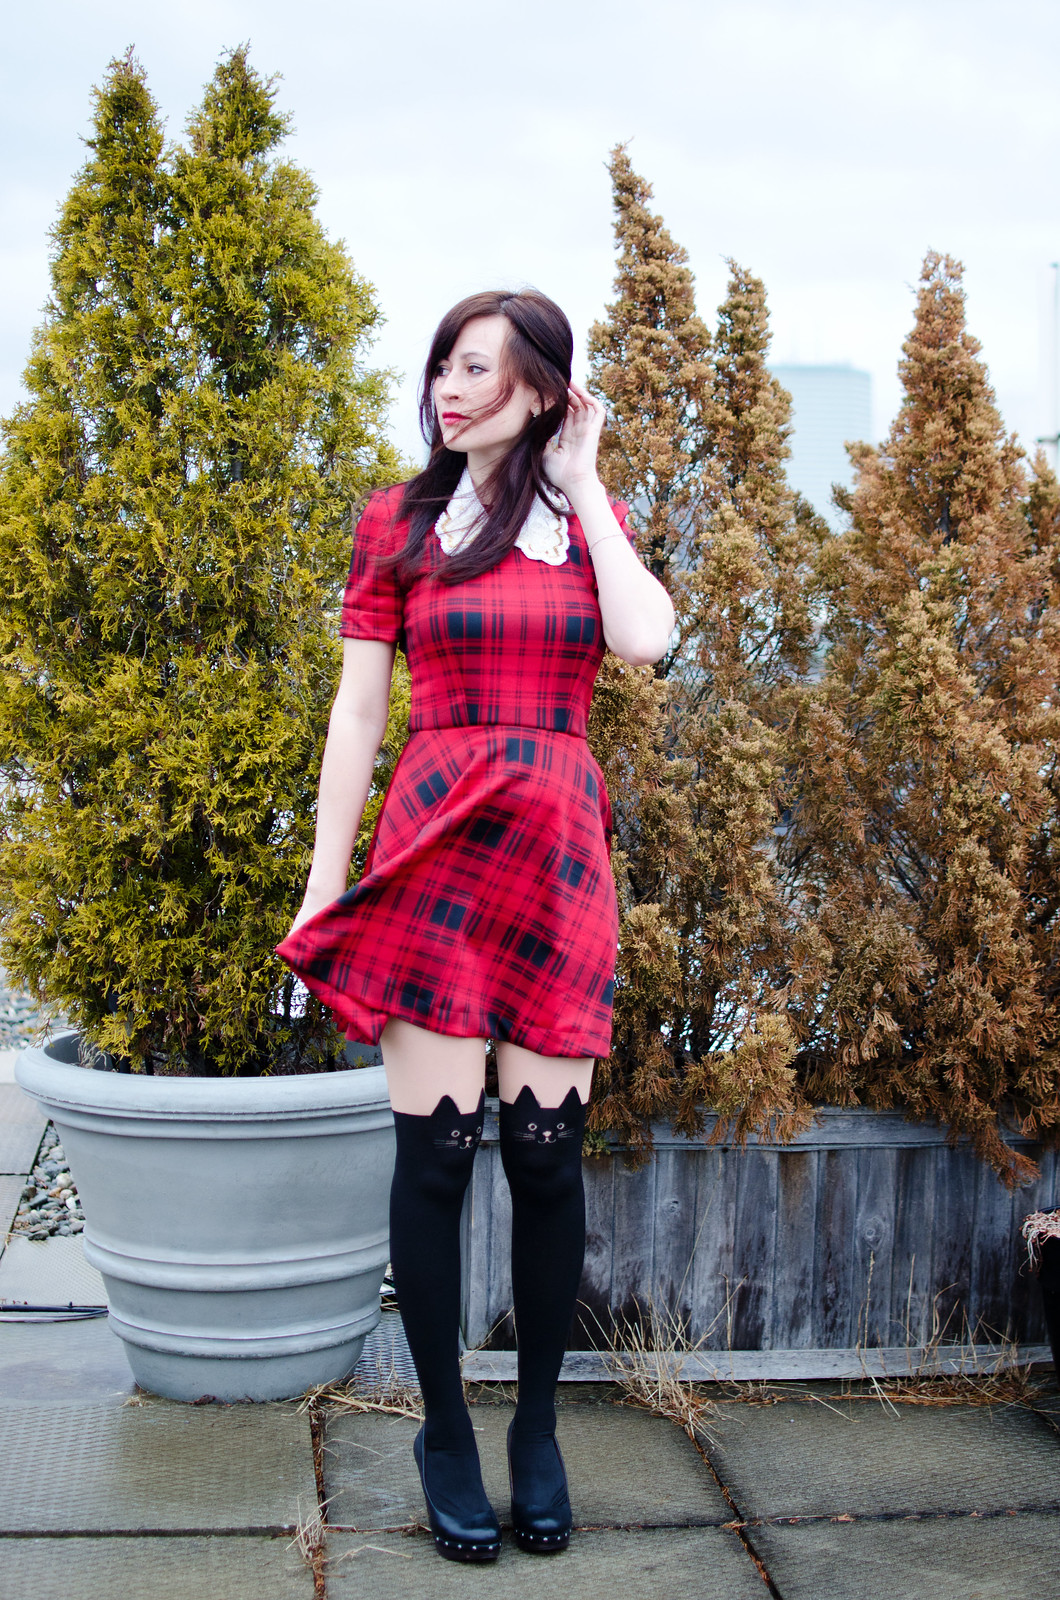
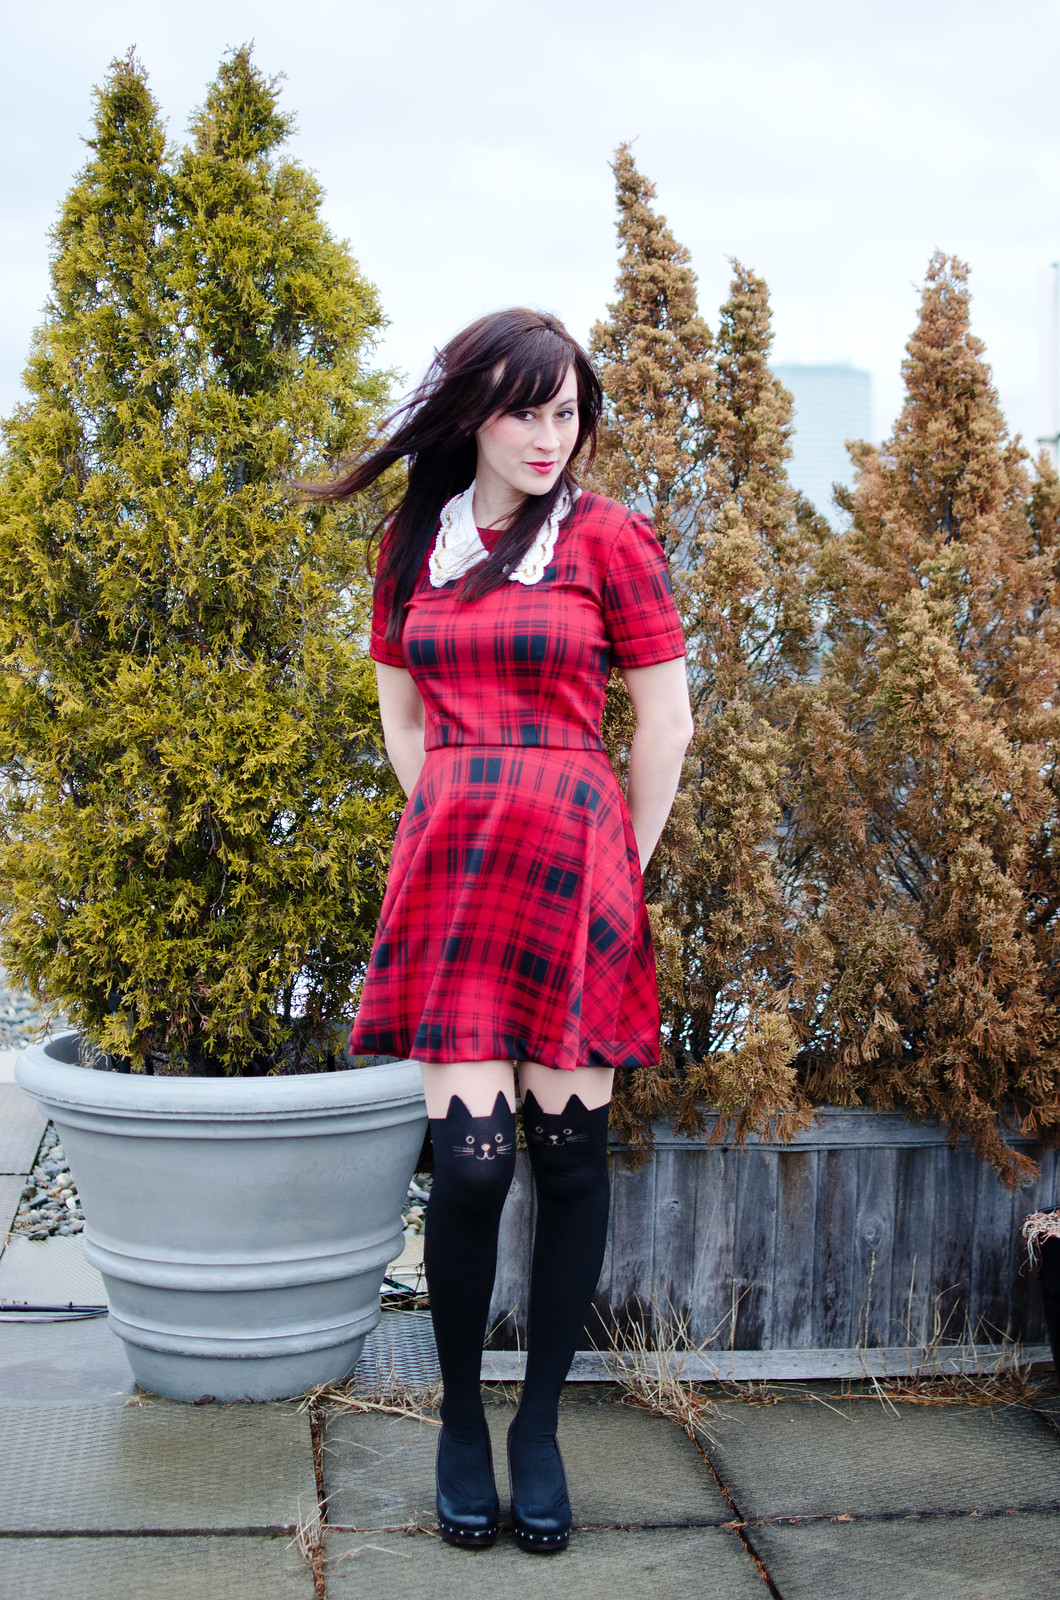
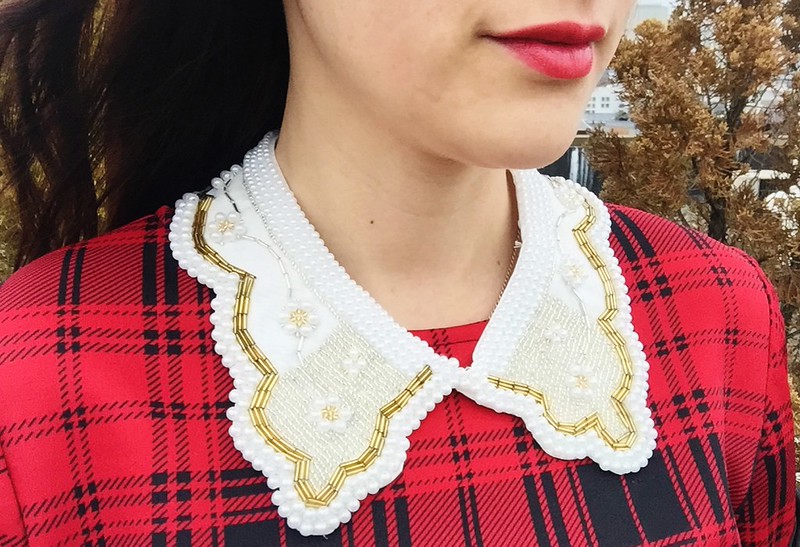
Plaid scuba dressdress: self-made, patterns here and here // detachable collar: self-made, pattern here // tights: random shop in a cat village in Taiwan // shoes: Seychelles

Hello 2015! Not sure how that happened. I’m still getting used to it not being summer anymore.

Anyway, sometime in November I wandered into Sewfisticated and they had randomly gotten a quite impressive selection of scuba knits. I briefly considered buying one of each but then came to my senses and went home with only two, a fancy floral and this lovely red plaid.

I had a pretty good idea of what I wanted to make: some kind of a short-sleeved skater/party dress kind of thing. I dug through some patterns and decided to use Burda 7739 with elongated sleeves for the top half and a slashed and widened lady skater skirt. Everything pretty much came together easily!

The scuba knit was so much fun to sew (and to wear! I often end up petting my skirt in public which is probably a bit weird). It’s kind of squashy and does what it’s told. I was entertained. The only issue I ran into was hemming the skirt and sleeves; I didn’t love the way the line of stitching stood out in the squashiness. I might undo it and do some kind of hidden hand-stitching on the inside instead.

I also realized that I somehow managed to recreate this dress pretty much exactly (other than the princess seams vs waist darts). I think this might even be the exact same fabric. Whoops?

I’m also so thrilled to have finally finished this detachable collar! I started it ages ago when Megan Nielsen first posted her tutorial and then got tired of beading and abandoned it. I mostly used her pattern but made the collar tips a little pointier. Of course when I picked it up again two months ago I decided to go even crazier and started hand-stitching seed beads onto it. My fingers were not pleased with this decision but I love the effect! I’ve been wearing it a lot to dress up lazy outfits.

In other news, I’m in love with these cat tights I picked up in Taiwan.

Sidenote: I’m giving the blog a bit of a facelift so excuse please the mess until I get things figured out!
Tiny princess

Tiny princess
I just wanted to pop in from all the Christmas/holiday/preparation/craziness to show you guys what is probably the cutest thing I’ve ever made. I’m dying. If you follow me on Instagram then you’ve already seen some sneak peeks.

I can’t remember how I got roped into making this. I’m pretty sure it was because my mom was telling me about my cousin’s two year old daughter who to wear anything not pink and my mom wanting to buy her a princess dress to bring when we visit them in Taiwan (For which we’re leaving tomorrow. Did I mention that? Because that’s happening. I should pack.) and I said “I bet I can make a cuter one for cheaper.” I’m pretty sure I won that, since this dress cost me all of $8.

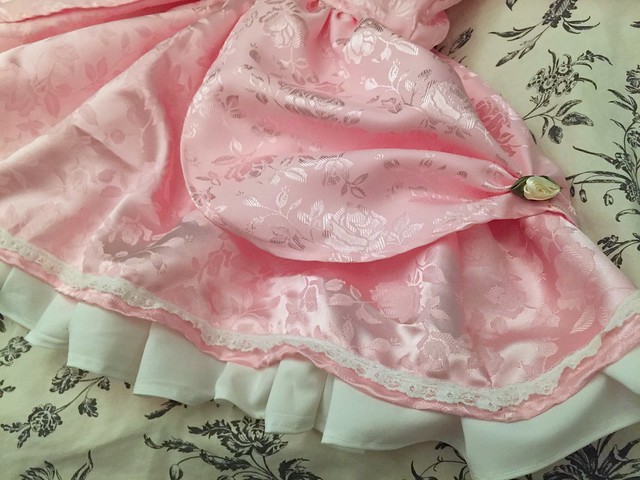
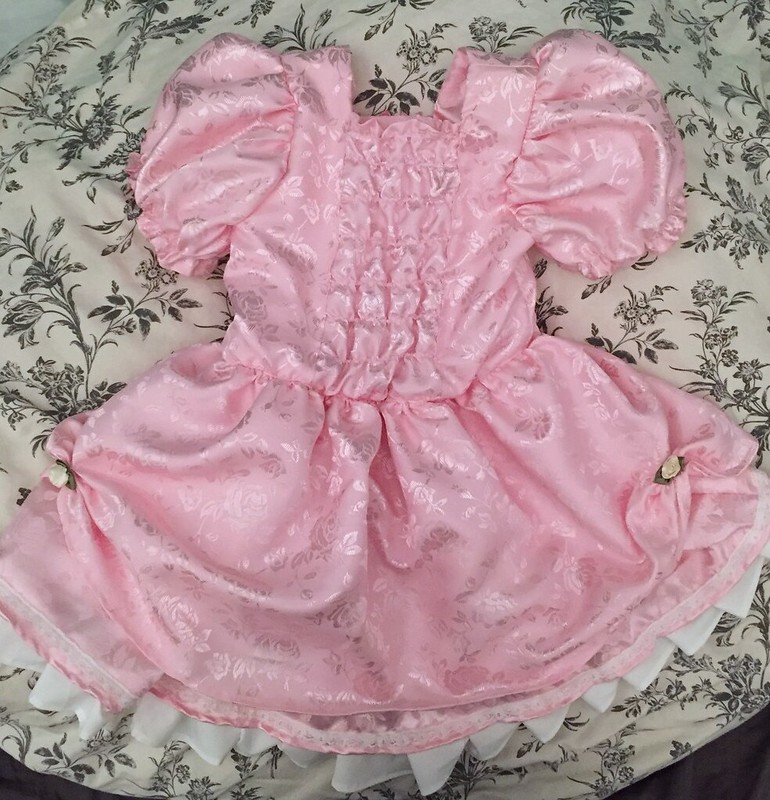
I started off with this sketch. I knew I wanted pink with a contrast front panel, a flouncy overskirt, and giant puffy sleeves. And tons of embellishments. I made some adjustments but it pretty much came together exactly how I imagined it.

Tiny princess

My aunt sent me a list of measurements, which I used to just sort of eyeball the pattern pieces. This was difficult because a) the measurements were in centimeters, and b) she sent them back in May and tiny humans grow alarmingly fast. I added about 2″ to most of the measurements and ended up putting in shirring in the back and elastic along the back of the waistband to help with fit. And so it’ll hopefully fit her for more than five minutes.

Tiny princess

The other annoying thing is this fabric is such a terrible poly that it was constantly unraveling into fluffy piles everywhere. The fact that I screwed up the skirt and had to unpick the entire thing meant I was leaving fluffy piles of pink all over sewing club. On the bright side, Laney donated a gorgeous little flower patch that I stitched onto the center front. I was originally going to do another bow but I figured a bow on each puffed sleeve was enough and this looks much more polished. Tehe.

Tiny princess

So yeah, fingers crossed it fits her! And merry holidays everyone!


Glitter everywhere

Elsa progress
PAX registration madness happened last Wednesday and now I’m all piney and excited about an event that’s still five months away. To entertain myself in the meantime, I decided to get started on one of my PAX costumes!

Last year I wore this monstrosity and while it was super fun to get all dressed up, I was the only one in my group who was really dressed up (Boyfriend wore a Jayne hat) and I was about six feet wide. If you’ve ever been to a con (especially one as crowded as PAX gets), you’ll know this is not the best of ideas. Also not being able to sit down wasn’t so much fun. I think I lasted about two hours as Kaylee before we ran home for a quick nap and I changed into Clara. Much more mobile. I decided that this year I’d do one ridiculous costume day and one more mobile and toned down day. Except I have about seven costumes I want to make and I’m only going two days.

The other part of this (very rambly and probably uninteresting) story is that I hadn’t seen Frozen until about two weeks ago because I had so many projects going on and I knew I’d immediately want to drop all of them to make all of the Frozen costumes. The moral of the story is that I’ve given in to the sparkly and I started Elsa’s costume this week.

Corset

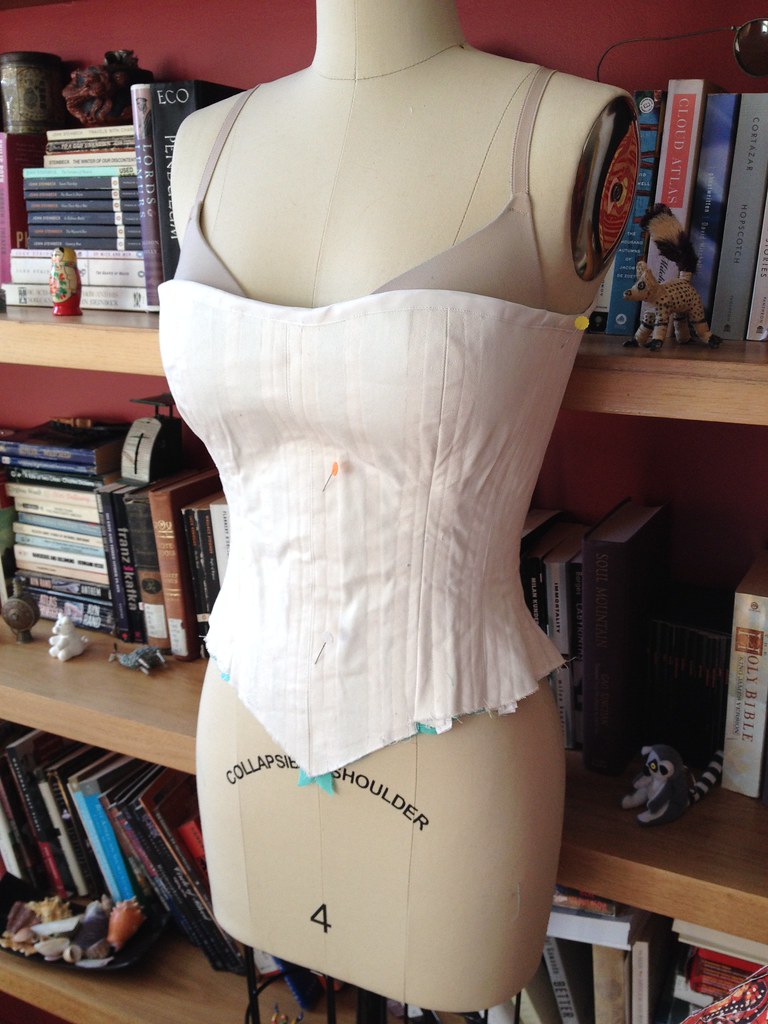
I’ve done some rough sketching and I’m thinking it’s either going to be a three piece outfit or a dress/cape and corset. There’ll be a mesh undershirt with the cape attached, a corset, and a slitted skirt. I haven’t decided whether it’ll be easier to have the skirt/mesh top attached or separate. So far I’ve started working on the corset using Butterick 4254. I added an inch to the length and cut a sharper V for the sweetheart neckline. I cut up some cotton twill curtains that I’m no longer using for the corset and I’m lining it with some rayon challis because it’s the only turquoise fabric I had lying around and it’s super soft.

Elsa progress

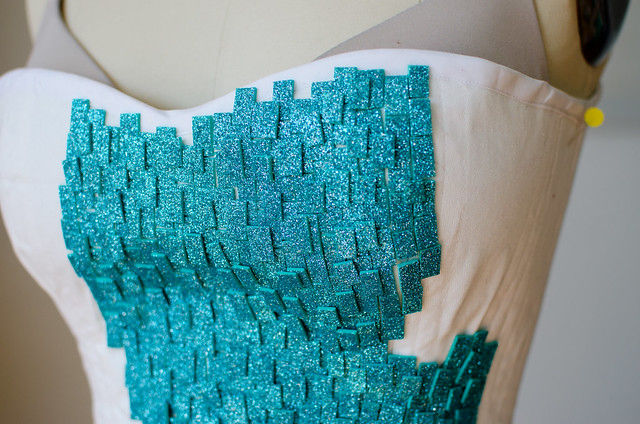
Anddd now I’m experiencing that awful twitchy feeling where you reaaaaally want to work on something but should probably wait for the rest of the materials before continuing. Right now I’m waiting for boning and lacing stuff but eight sheets of this stuff in turquoise (please be enough! *fingers crossed*) arrived yesterday and I’ve sort of succumbed to the glitter. I’m cutting the sheets into tiny rectangles and slightly bigger rectangles and then gluing them on to the corset with tacky glue. I’m trying to make them all different shapes so they don’t quite fit together and then gluing the tiny ones on top to fill in the gaps. So far so good! Except I can’t go anywhere near the bottom or the back edges because I haven’t inserted the boning, sewn on the bottom edging, or done the grommets for the lacing.

Thisisslightlyagonizing.

Bewbs

Marlborough bra

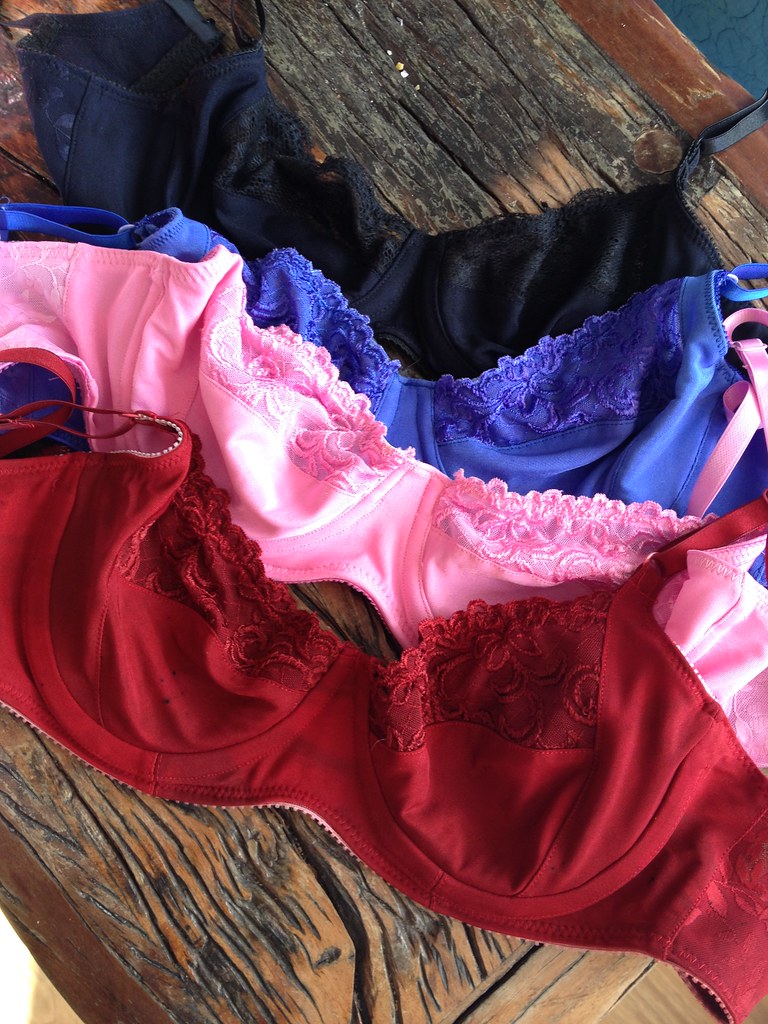
A few weeks ago Norma of Orange Lingerie released a pattern and my world exploded in a flurry of elastics and underwires. Ok, explosion might be an overstatement but I’ve made four in the past two weeks and I have plans for so many more. SO MANY.

Bra-making was something I’d always admired from afar. I figured it was something I could probably learn but I had no idea where to begin. Most of the sewing projects I do require matching thread and maybe a zipper, occasionally buttons. Easy peasy. You go to Sew Sassy’s website and they have 8000 kinds of elastic and they each come in ten different widths. I decided the simplest way to dive in was to just buy a kit.

Marlborough bra

I found an Etsy shop called Hooks & Wires that sold bra kits in all kinds of amazing colors for $18 and emailed the lady about two colors I was interested in. She only had a few kits listed but I checked her sold listings and she was happy to dye the ones I’d requested. Two weeks later I had two gorgeous kits in the mail, including everything I’d need for the Marlborough bra (I checked with Norma first!). I also asked for materials for matching undies to be included (an extra $12 per kit). The Hooks & Wires kits are great! The only things I didn’t like about it are the bra closures and the channeling, which were flannel-y. I prefer the more substantial satiny ones I ordered from Sew Sassy.

Marlborough bra

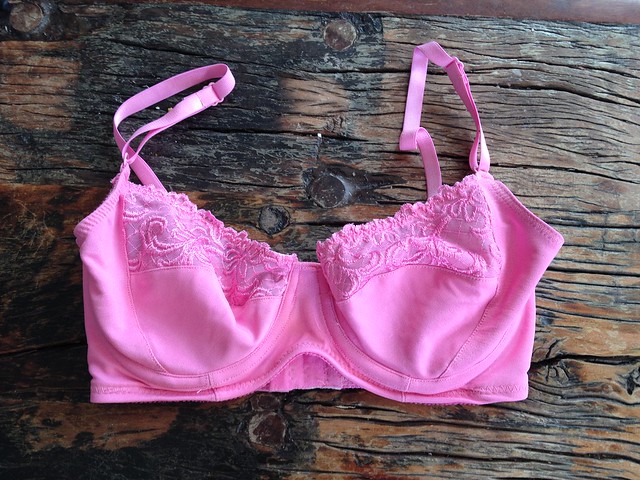
My first bra turned out wearable albeit a bit messy, which I was expecting. I had lots of issues with the underwire channeling, which I later figured out was because I was doing it incorrectly. Whoops. My next bra turned out even better (although still had the same channeling issue because I hadn’t figured it out yet) and is my second favorite bra right now.

Marlborough bra

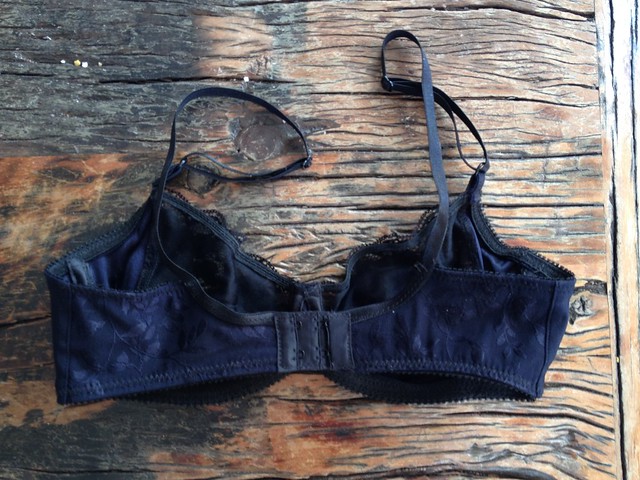
For my third bra, I did some experimenting. I had extra fabric leftover from the kits so I cut out all the pieces, dyed them black, and used some black Sew Sassy hardware (elastic, closures, sliders, underwire) to make another one. I’d also bought some black lace for the upper cup piece. This one is my absolute favorite.

Marlborough bra

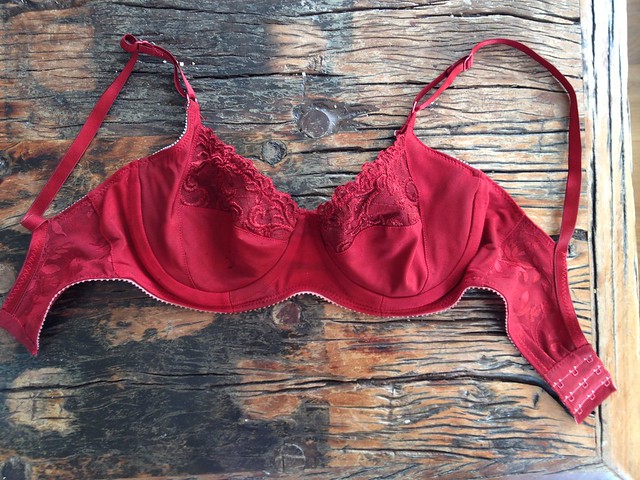
The fourth one was also dyed from extra fabric from one of the kits and I also experimented with dyeing the hardware. As you can see some of it took to the dye better than others. I forgot to take a photo of the process but I mixed some RIT dye, boiling water, and vinegar in a mason jar. I dropped all the pre-cut pieces in, swished them around, and left the jar in the sun for a while. I added some more boiling water after about half an hour. I think it sat in the sun for about an hour. The color turned out pretty awesome, although there is some splotchiness. I need to get better at remembering to make sure the dye is completely dissolved before dumping everything in. Oh well, it’s totally wearable.

Marlborough bra

I don’t know if you can tell from the photos but I’ve been making these guys in two sister sizes because I can’t for the life of me figure out which one fits better. The black and blue/purple ones are 34C. The pink one is a straight 32D and the red one is a 32D with about half an inch added to each band piece (so technically a 33D?).

Marlborough bra

Other resources: 
-I haven’t finished reading Norma’s book but so far it’s been a great help.
-I can’t remember why but I bought a yard of this stuff to use as bra lining ages ago and it’s lasted me forever. I’ve been using it to line the lace upper cup only (especially if I’m using a lighter weight lace) so I’ll probably never run out of it. I’m planning on doing an all lace bra next so I’ll probably line that whole bra with this stuff.
-For more crazy bra kits Merckwaerdigh does some with really gorgeous prints. I haven’t used them because of indecisiveness in the form of I-want-all-of-them.
-Also Sarah has recently started stocking gorgeous bra kits at Grey’s! I’m having a similar indecisiveness problem. I’m going to be that weirdo with 50 bras. My bewbs have never felt so supported.

Hungerween // giveaway winner

Katniss tribute parade
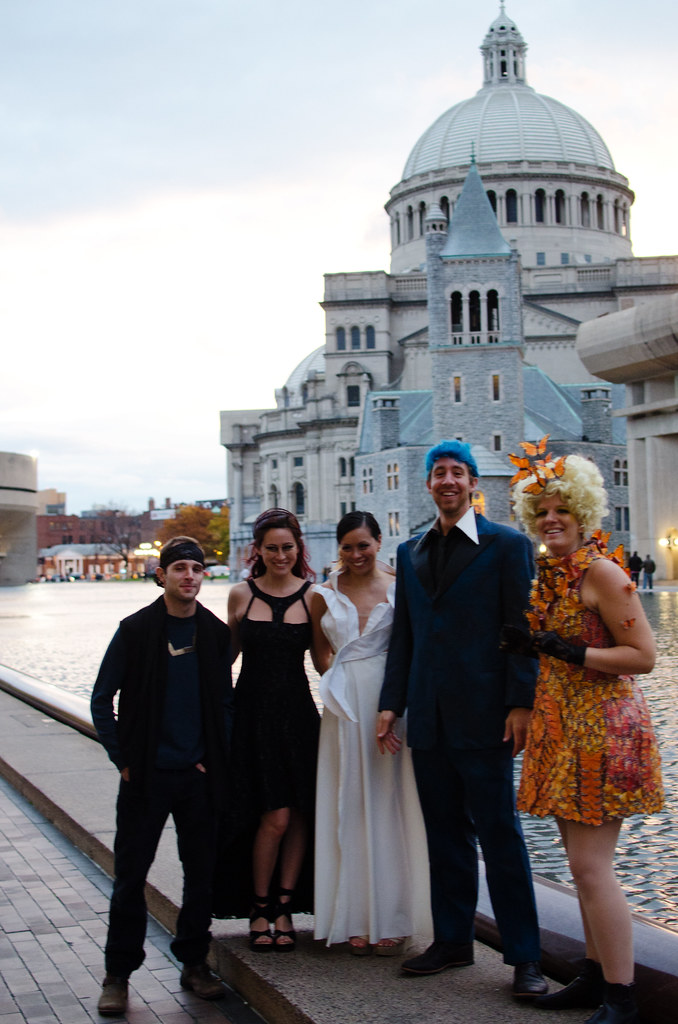
me in Katniss’ tribute parade dress

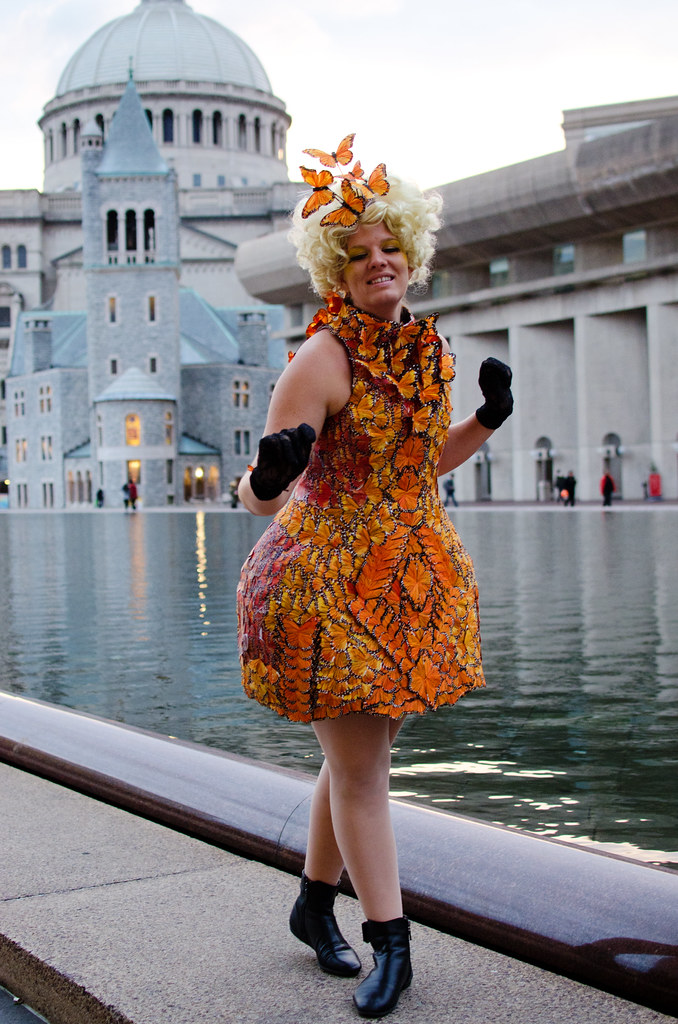
Effie Trinket butterfly dress
my roomie made Effie Trinket’s amazing Alexander McQueen butterfly dress (yes those are individual butterfly wings and yes she’s promised to do a guest post on how she did it.)

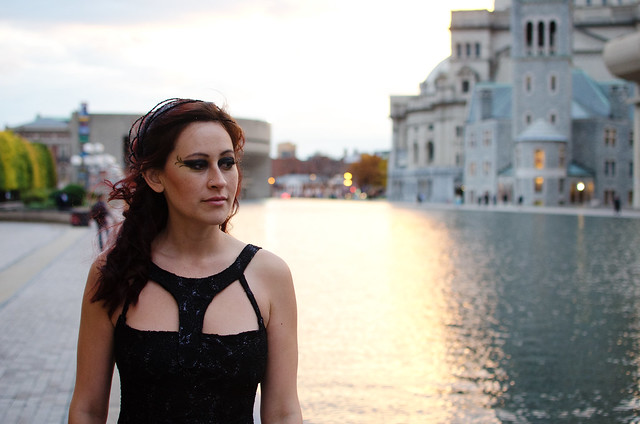
Johanna Mason
my sister as Johanna Mason in the Mockingjay promos

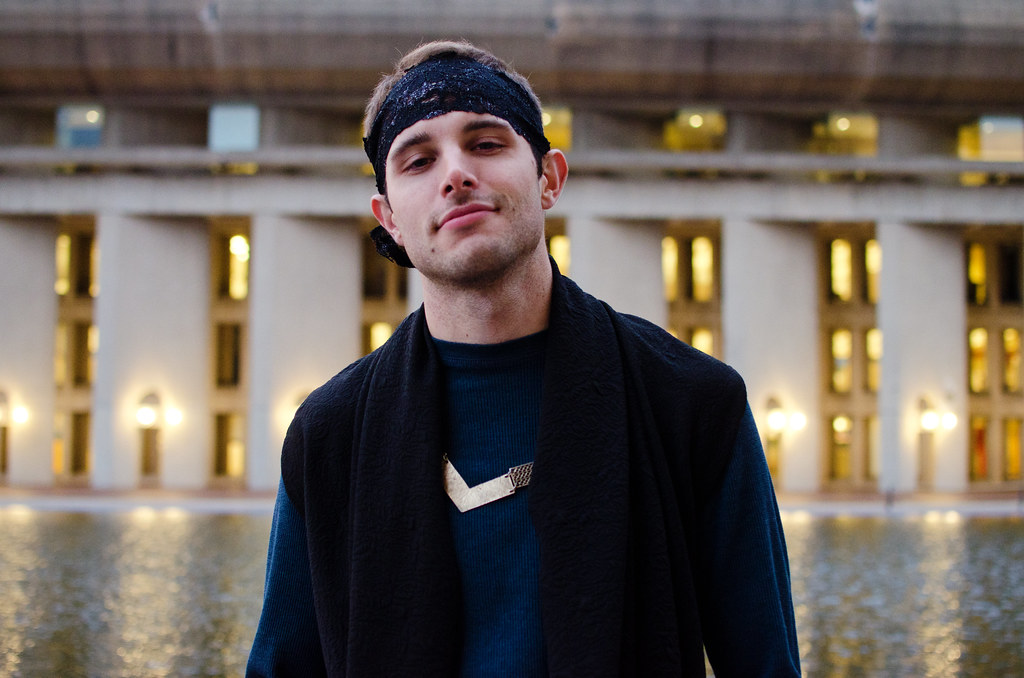
Cinna
boyfriend as Cinna

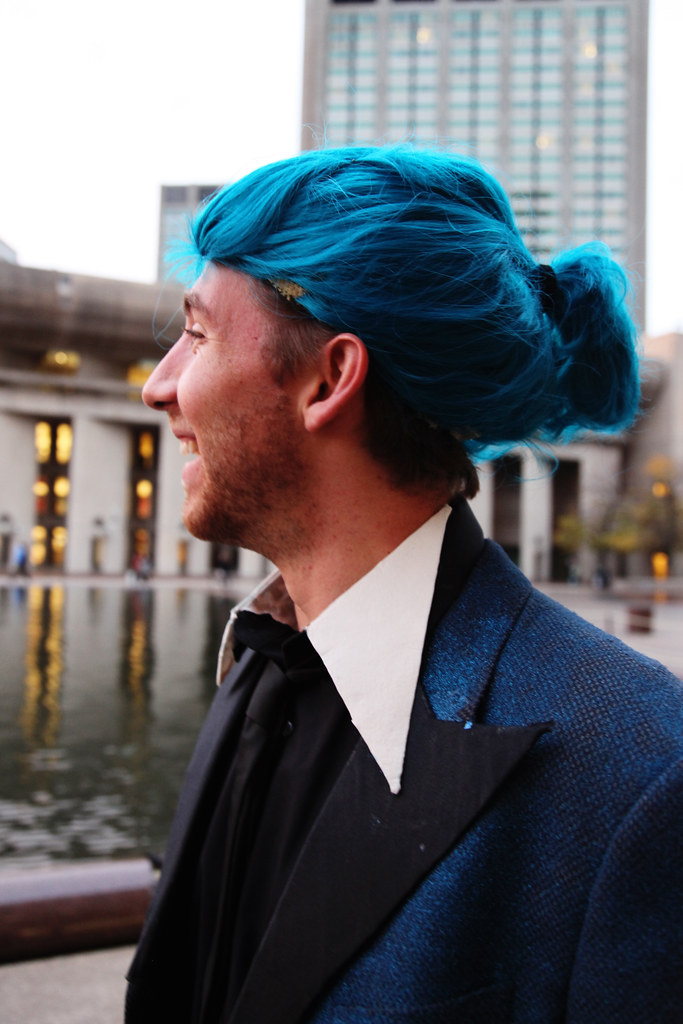
Caesar Flickerman
roomie’s brother as Caesar Flickerman

Hungerween

If you’ve been following my instagram you’ll know that Halloween this year sort of turned into Hungerween what with a group of us choosing Hunger Games related costumes. I think it started when my roomie decided she wanted to make Effie Trinket’s butterfly dress from Catching Fire. And then it exploded.

We spent the better part of the last month putting together costumes and getting waaay into it. I’m still working on sorting through the 900 photos that were taken Friday night and will definitely be doing individual costume posts!

And since I completely forgot to post this in the midst of Hungerween craziness last week, the winner of the Love at First Stitch giveaway is Lisa!

Screen Shot 2014-11-02 at 11.38.10 AM Screen Shot 2014-11-02 at 11.39.37 AM

Congrats Lisa! Please email me so I can get your book out to you!

options_framework_theme Theme by NUDGE MEDIA DESIGN.