Tag Archives: dress

Flower-picking

Copying RTW - blue dress

Copying RTW - blue dress

Copying RTW - blue dress

Copying RTW - blue dress

Copying RTW - blue dress

Copying RTW - blue dress

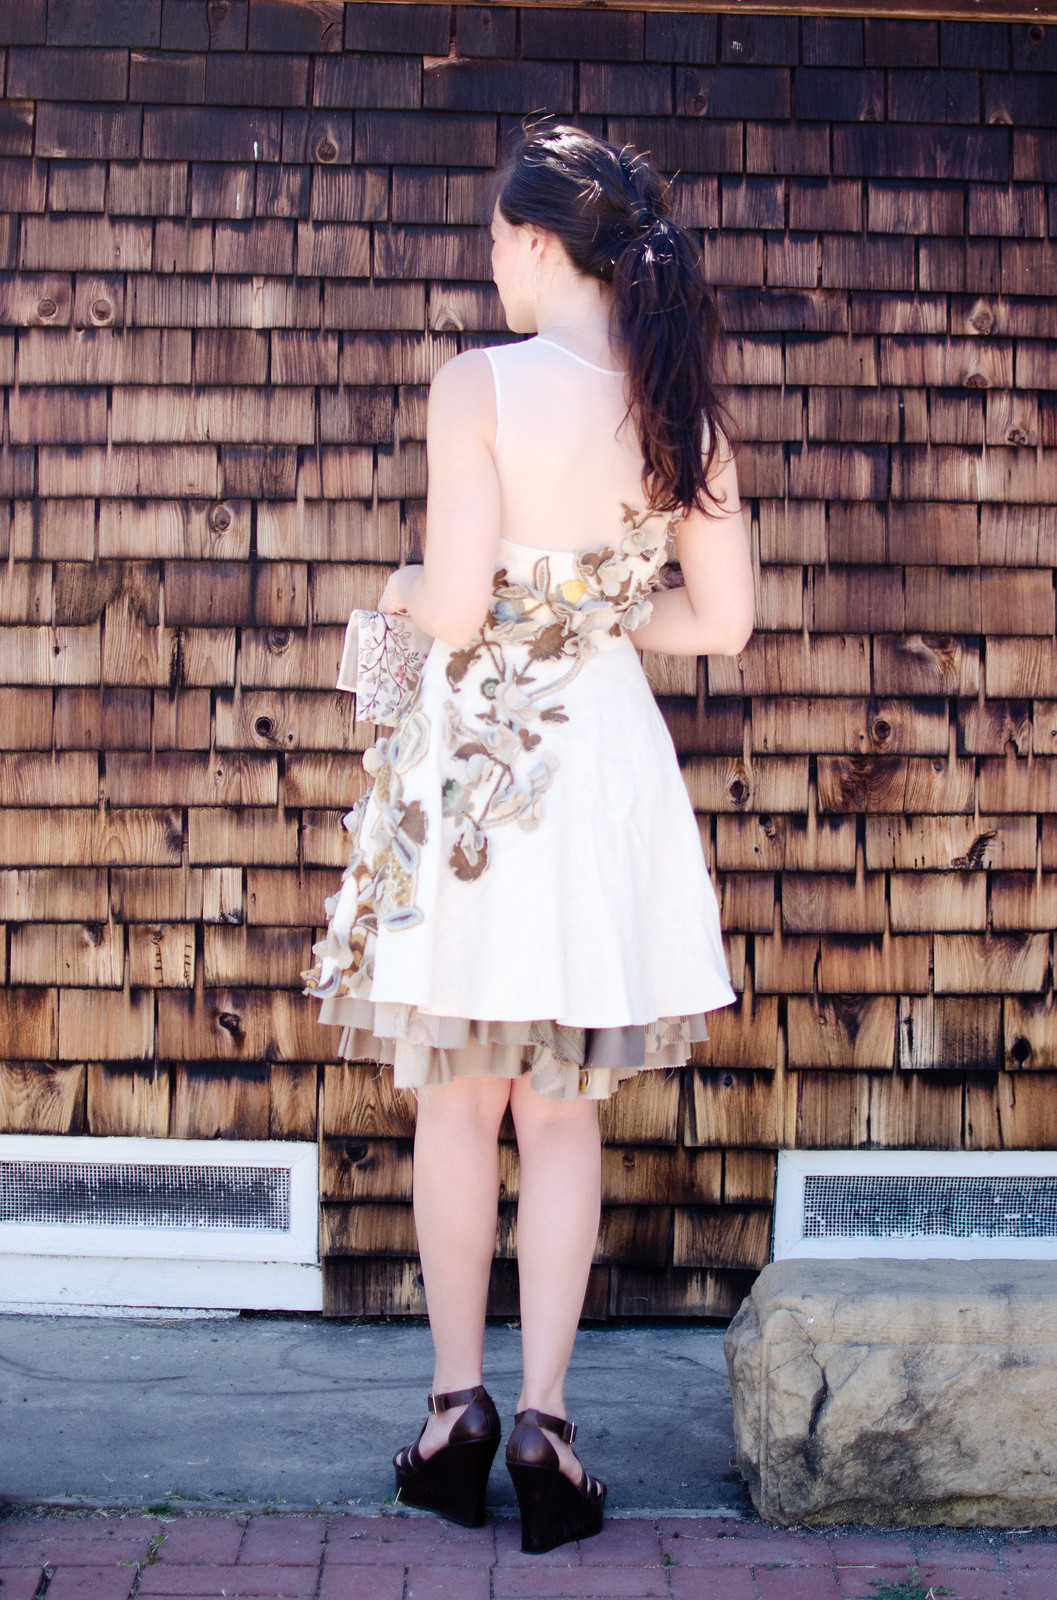
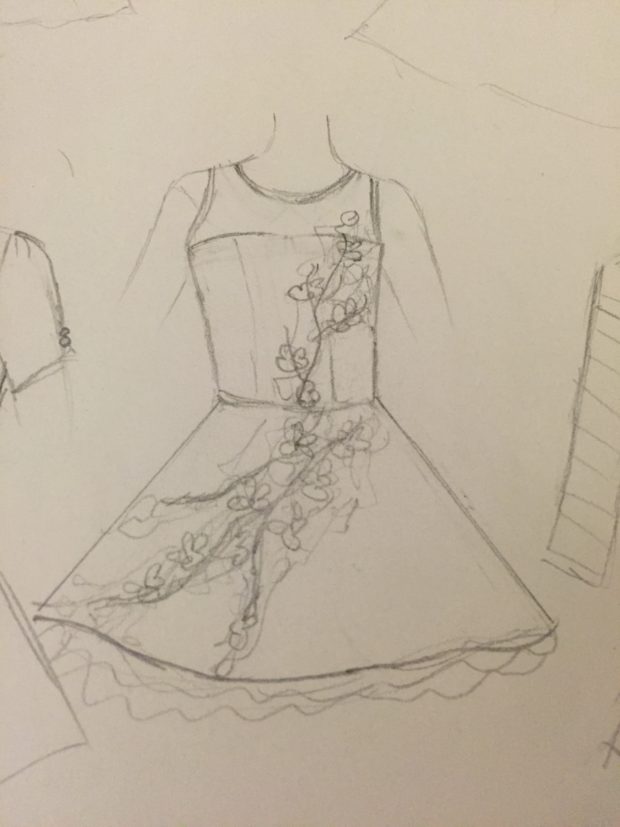
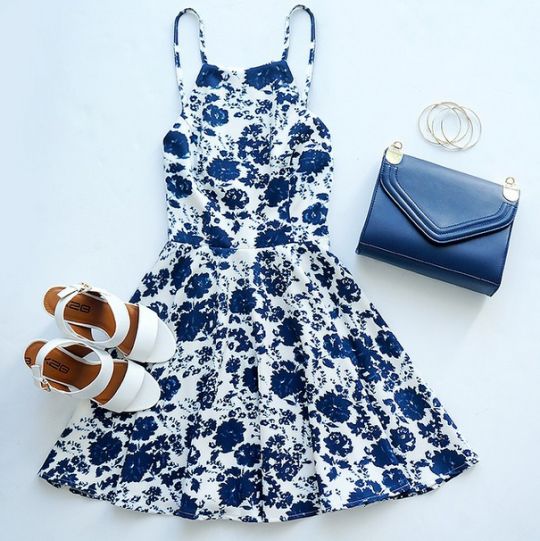
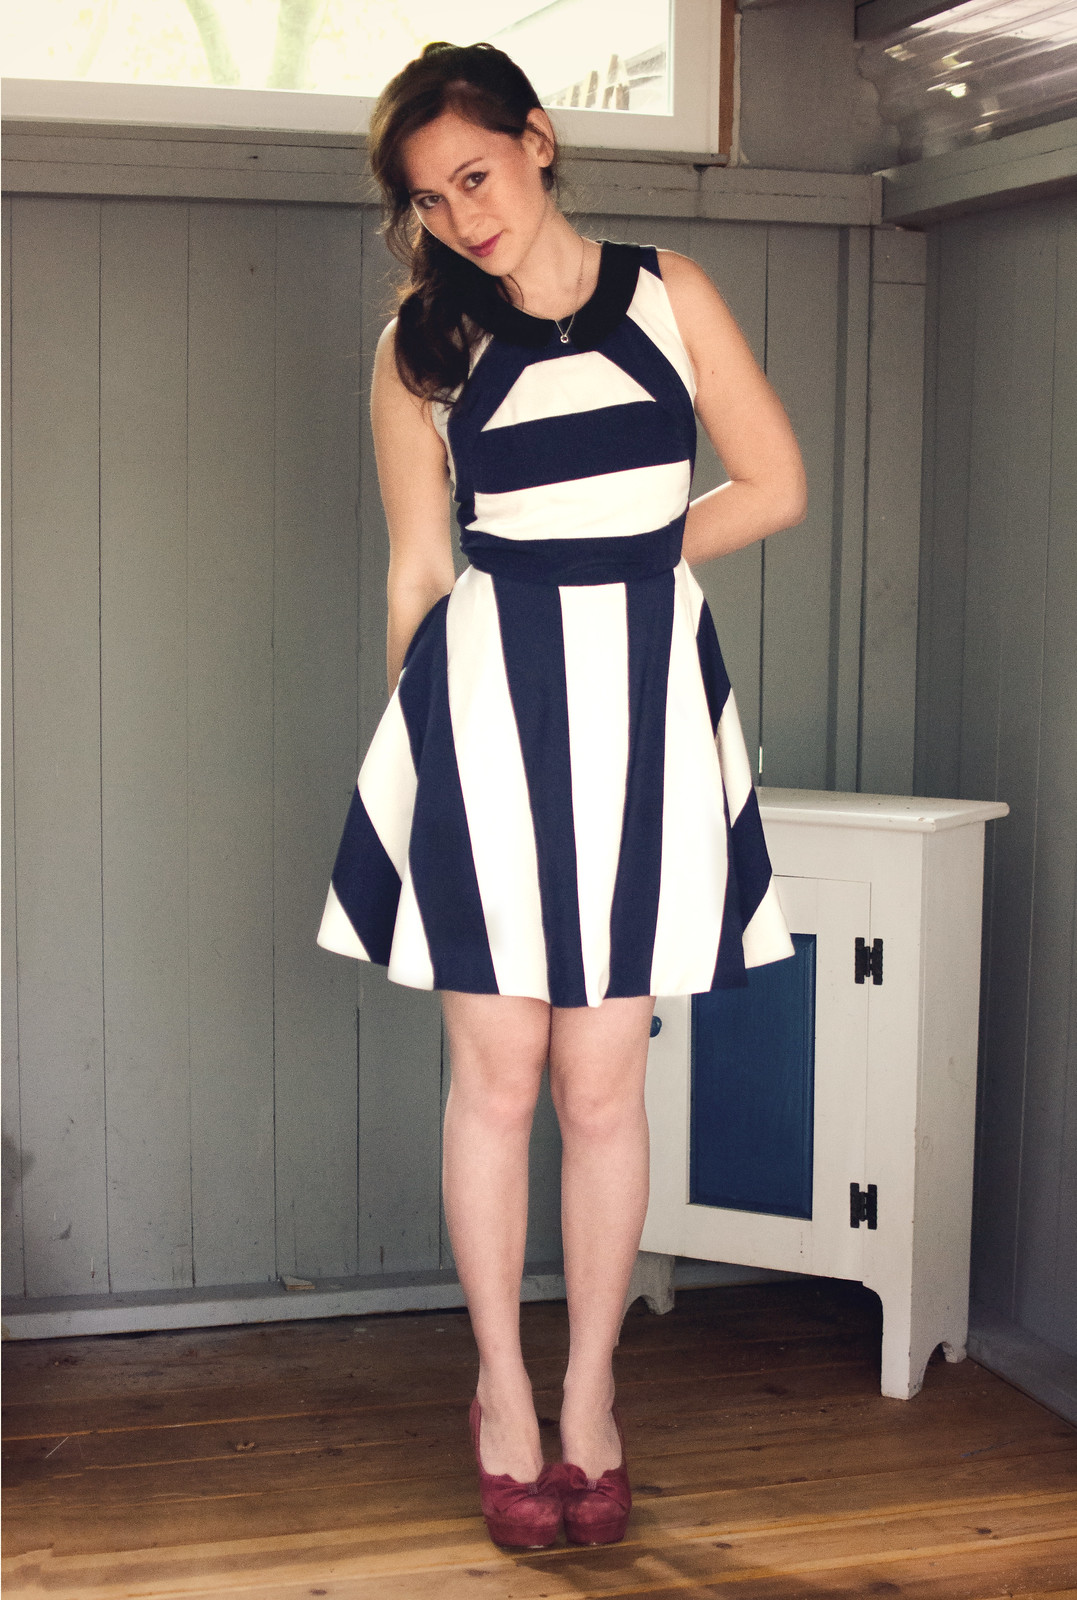
About a million years ago I bought this dress at Forever21. It was a cute little cotton floral dress with a lined bodice, back cut-out, gigantic pockets, and pretty wooden buttons along the back. It fit me perfectly and was the perfect comfy summer dress. Or the perfect dress for picking flowers and/or berries. I had to really resist making a flower crown for this post.

Anyway, over the years I’ve gotten rid of every other Forever21 purchase but I could never seem to let go of this one. I had this idea that I was going to try to make more of them but it never really seemed to happen. Then this summer I took a Copying Ready to Wear class at school. I decided to use a coat as my class project so I could learn all the more difficult stuff, but as soon as class was over I used the same techniques to whip up this dress. (And then immediately made a second one, and started a third. More on those later.)

Copying RTW - F21 dress

Copying RTW - F21 dress

I used this Cotton + Steel fabric (I actually ordered it from Craftsy but they don’t seem to have it anymore) and it’s so so so perfect. It’s got the great crispness of cotton which is perfect for all those gathers and the pockets, but it’s a lawn so lightweight and doesn’t look like it’s made of quilting cotton. Insert heart eyes here. And then there’s the buttons!! I knew I wanted wooden ones but I was in one of those situations where I wanted the dress to be done RIGHTTHISMINUTE so I could wear it, so I only had time to go to Joann’s. The only ones they had that were wood and big enough were these stupid square ones. Except then I realized if I turned them a bit they became diamonds and suddenly they fit perfectly with the print. *squee*

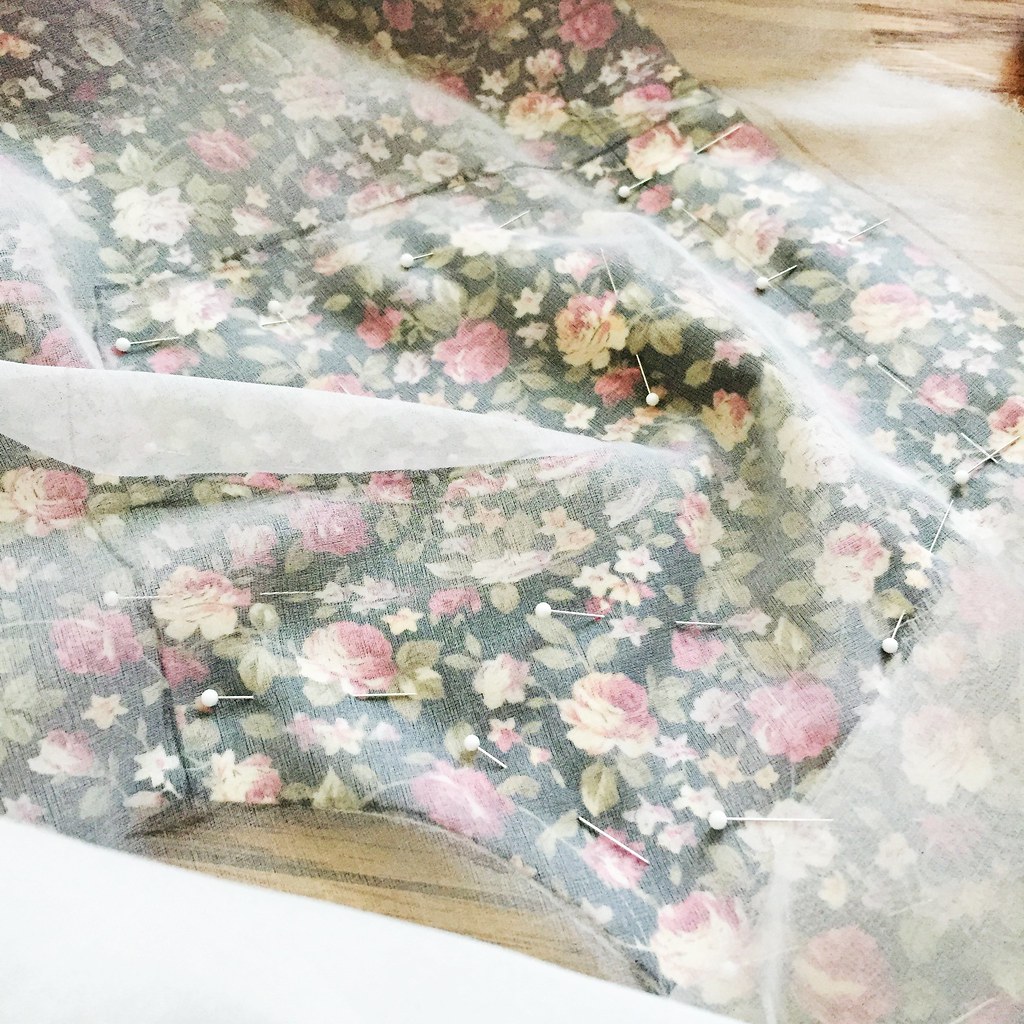
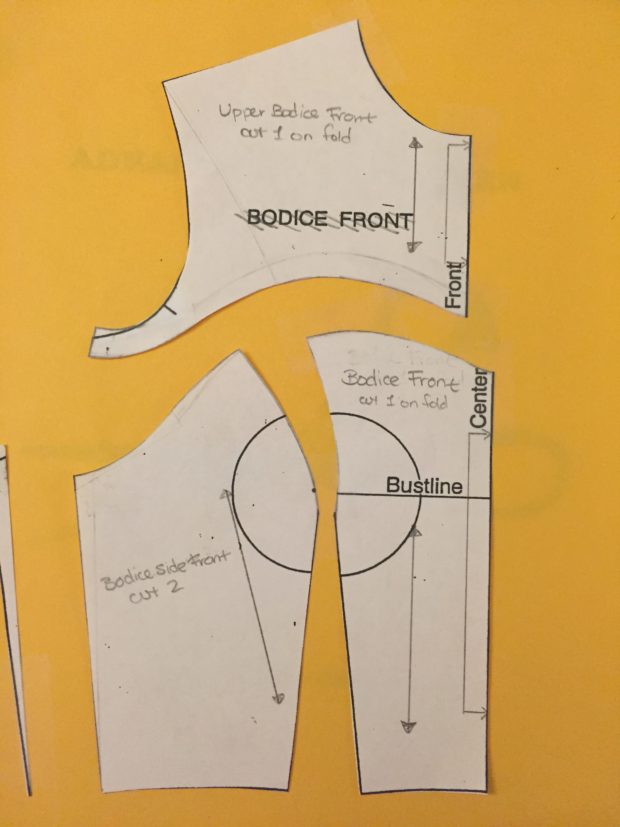
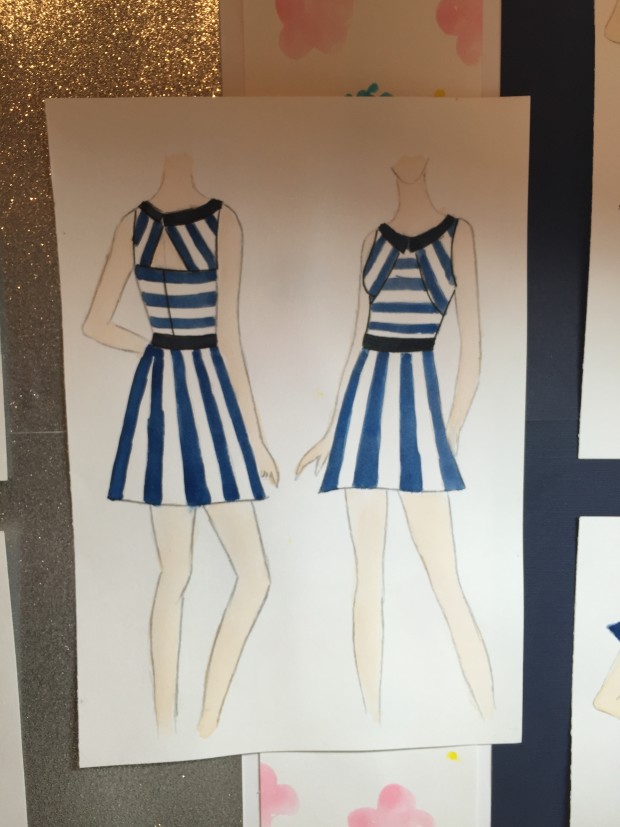
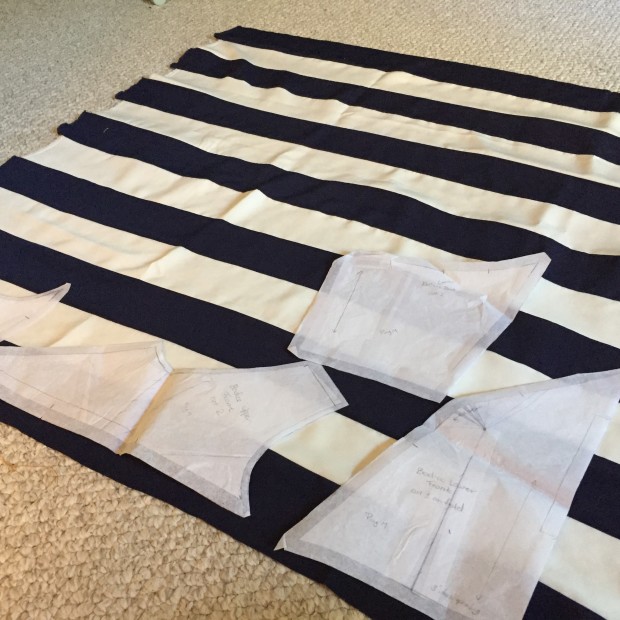
The nice thing about this technique for copying RTW garments is that you don’t actually have to take the garment apart. It can be rather time-consuming though, so you do want to make sure you’re putting all the work in for a garment you’d actually want to wear in the end. The super simplified gist of it is you mark grain lines on the RTW garment with thread, then use marked silk organza and about a million pins to trace seam lines and darts. Then you transfer those to tissue, true up your lines, and you’ve got a pattern of your RTW garment.

copying RTW F21 dress

If you’re interested in the more in-depth version of this, the book we used in class was “Making Garments from Existing Garments” by Kenneth King. It’s fairly in depth with lots of photos which makes the process pretty easy to follow. I believe his Jean-ius class on Craftsy uses the same technique if you’re a more visual learner. And of course, if you’re in the San Francisco Bay Area, you should just hop over to Canada College and take the class with Lynda Maynard because she’s fantastic. (Although I’m not sure if it’s offered every summer. Might be every other summer.)

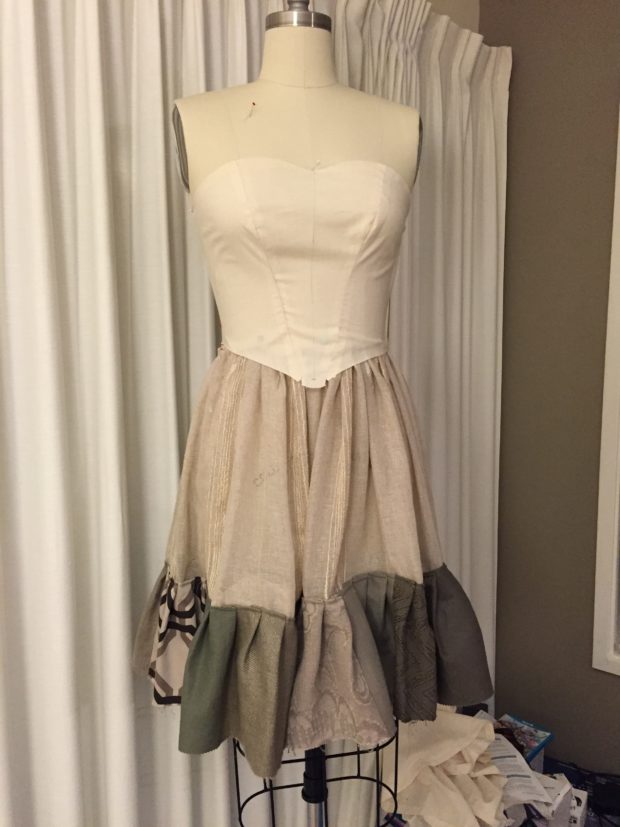
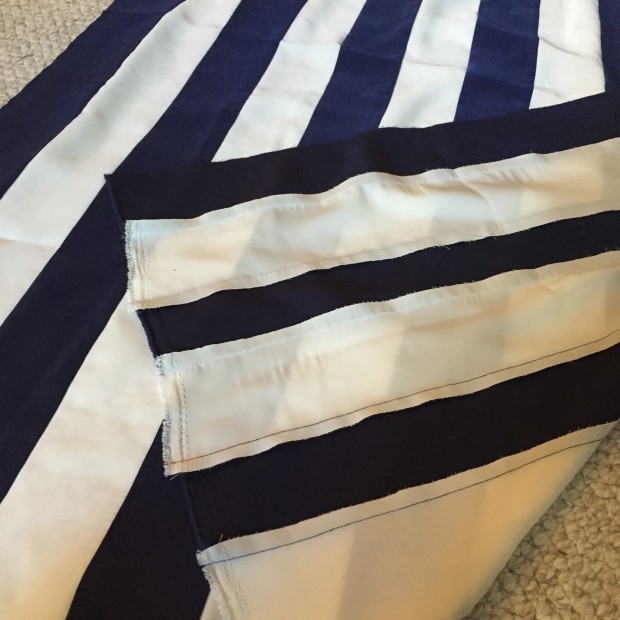
In other news, these are my new favorite pockets and I want to add them to cardigans and other full-skirted dresses. You basically just cut them wider at the top edge than the bottom edge (like a trapezoid), but then stitch the side seams parallel so the excess from the top edge falls away from the garment.

Now excuse me while I go find some berries to pick. I have a sudden blackberry craving.

Adventures in patterndrafting // mystery fabric contest

Mystery Fabric Contest dress

Mystery Fabric Contest dress

Mystery Fabric Contest dress

Mystery Fabric Contest dress

Mystery Fabric Contest dress

Mystery Fabric Contest dress

Mystery Fabric Contest dress

Mystery Fabric Contest dress

My school hosts a mystery fabric contest every year. This year participants received a bundle of mystery fabric, each one marked only with a number and the general color scheme of the fabric inside. You have from October to April to put together a garment using at least 50% of each piece of fabric included. Some people received several yards of the same fabric. Other people (ahem, me) received mostly tiny samples, with nothing bigger than a fat quarter. You can add as much fabric as you want too!

2016-01-28 22.37.12

2016-01-28 22.37.03

I was pretty stumped for a while after getting my bundle. At first I was thinking of doing something big and dramatic a la Regina from Once Upon A Time (season 1-2), with one side done in a cool patchwork pattern and the other side in a solid or floral print, but I kept coming back to a fear of it coming out looking like a quilt so I nixed that idea. Then one day when I was working on Cinderella’s ball gown while simultaneously daydreaming about doing Cinderella’s wedding gown (I am a crazy person, yes.), I had a lightbulb moment. Why not do a modernized party dress version of Cinderella’s wedding dress, but with the same floral/mesh/gauzy look?

2016-01-28 22.01.19

I started off drafting a pattern for a dress with an upper yoke in a sweetheart neckline shape. Since I knew I wanted to sew the upper yoke in mesh and since I wanted it to have a more formal party dress kind of look, I did a lot of contouring around the princess lines and sweetheart neckline to make it more form-fitting. Then I just used the same skirt pattern as my Christmas dress. Since a lot of the fabrics in my bundle were linens in earthy colors, I went for a similarly earthy (but still somewhat fancy-looking) linen from Joanns in ivory.

2016-01-28 22.01.26

Construction-wise, I started off by taking the three identical pieces of sheer gauzy curtain fabric and sewing them together as a dirndl underskirt. Then I tore off all of the sample rectangles and cut up the backing fabric into similarly sized rectangles and sewed them together into a long piece (similar to what I did for my Cinderella ball gown). I then pleated  those and attached them in two tiers to the underskirt so they would peek out a bit under the main dress.

2016-03-07 23.17.29

I’d had a hard time trying to figure out what to do with all of the thicker embroidered fabrics (especially ones where the background fabric clashed) so I decided to cut the embroidery out of the fabric and sew it onto my dress.

2016-03-24 13.06.28

One of them was some kind of burlap-ish canvas and had a floral vine pattern so I cut out the vines and used them as the base for the hand-stitched design. Then I cut the background fabric into little flower shapes and folded them slightly and stitched them all over the garment.

2016-03-12 18.59.28

You may also have noticed the gorgeous colorful embroidered flowers on the horrid mustard background up there. Since the mustard really didn’t fit with anything, I decided to cut out all those little designs too and sewed them all over the dress for little hidden bits of color. Some of the bigger pieces ended up on the side of the skirt too.

2016-03-16 21.41.10

The end!

2016-03-24 13.16.48

You can check out some of the other submissions here. Tiny spoiler alert: my dress won first place!


Adventures in drafting // red wedding

Red dress

Red dress

Red dress

Red dress

Red dress

Red dresspattern: self-drafted // shoes: Cathy Jean

Haha just kidding. My friends’ wedding was lovely! No murderous musicians.

Anyway, I made this dress because a day before hopping on a plane to DC, I realized that every dress I owned was either black, white, one of the wedding colors, or more appropriate for winter.  So, I took a break from the Epic Peacoat Copycat of July to draft a quick pattern and then made an extremely panicked trip to Joann’s.

IMG_9062

I had found this photo somewhere on Pinterest (not sure where the original is from!) and wanted to do kind of a high-ish front, low-ish back sort of thing. I basically just lowered the neckline ~2″ and drew a new flatter neckline, did a sleeveless adjustment (bring armholes up 1/2″ and in 1/2″), then drew connecting curves from the new armhole up to the corner of the new neckline. Then I contoured the crap out of all it and moved the bust darts up and turned them into princess lines. The back was easy, I just repeated the sleeveless adjustment, closed the waist dart, and drew a line from from the armhole dipping lower at center back.

I didn’t have much time for tweaking but I’m pretty pleased with how it turned out! We were going through a bit of a heat wave last week so I was way too hot and miserable (and lacking in time) to deal with figuring out a bra for this one so I decided to just go bra-les. Eh, it worked out I think.

IMG_0225

How cool is this fabric though?? I briefly considered adding trim or some other detailing to the dress but a) no time, and b) it really didn’t need it because of the cool texturing. Also, thank you Great British Sewing Bee for teaching me that even more subtle patterns should really be centered.

(Yes, it’s still bothering me that I was totally off on this dress but I feel slightly redeemed after getting it right this time.)

In other news, all this red is making me miss my red hair.

Refashion // beads & silk

Kimono refashion

Kimono refashion

Vintage silk beaded dress refashion

Vintage silk beaded dress refashion

Kimono refashion

Vintage silk beaded dress refashion

Kimono refashion

Vintage silk beaded dress refashion

Kimono refashion

Vintage silk beaded dress refashion

I got a bunch of really gorgeous vintage dresses from one of Boyfriend’s relatives a few weeks ago and I was so excited about this one I dove right in and finished it in two days.

Kimono refashion

But let’s back up. This started out as a bit of a monstrosity. There were shoulder pads, shoulder flanges, no shaping darts anywhere, and awkwardly long sleeves. There was, however, the most gorgeous beading all over the back, as well as on the edges of the bottom and sleeves. Plus, it’s 100% silk and has the most luscious drape.

I knew immediately that I had to keep the beading all in on piece and not mess with it at all. I toyed with the idea of doing some kind of short shift dress, but all of the beading just seemed too heavy for that kind of design. Then I had one of those light bulb moments and realized that it would be much better balanced if I just turned it around and put the beading on the back.

Kimono refashion

Once I had a design idea, the first thing I had to do was a lot of careful seam-ripping. I unpicked the shoulder flanges and then undid the side seams up to about where I wanted to hack off the skirt. Then I did a lot of procrastinating before actually slicing off the skirt.

Kimono refashion

You guys, cutting into this thing was SO nerve-wracking. I chewed on my nails for a while and then just went for it. I decided I wanted a high-low thing going on at the hem so I measured and cut accordingly. The front is 3″ shorter than the back. Then I cut straight down the center back which would become the center front opening. I took the excess skirt fabric and cut long strips that would become the center front panels, and reshaped the front neckline to get a more kimono-esque shape. I also had to draft a back neck piece, which I sewed to the front panel strips, and unpick the facings, which I felt inordinately guilty doing since they were so beautifully sewn in.

After that was a ton of hand-stitching. I sewed one side of the front panels on by machine but pretty much everything else was done by hand, including re-attaching all the beading to the bottom hem. I’m debating also adding beading to the end of the sleeves but haven’t decided if that would be a nice balance or just be too much.

Either way I absolutely love how it turned out. It’s super swishy and fun to wear. Actually I didn’t realize until just now that I subconsciously picked my swishy Minnetonka boots to wear with it. Multi-swish! I’m literally slightly bummed that it stands out so much because I keep wanting to wear it every day. (I finished it a week ago and have worn it like three times already.)

(And yes, I should steam that back hem again. Wherps.)

Anddd I’ll leave you with a photo of me looking utterly ravishing in a backwards shoulder-padsy dress.

Kimono refashion

adventures in drafting // self-striping

Striped dress

Striped dress

Striped dress

Striped dressdress: self-drafted // shoes: Seychelles

**Photos should hopefully be fixed now!

No, not like sock yarn. Like when you go crazy and decide to make your own striped fabric.

2016-03-24 16.16.06

In my defense I really tried to find navy and white striped fabric and just couldn’t. At the beginning of this semester we were assigned a storyboard of a five garment mini-collection, with the stipulation that one of our three garments due this semester had to be from the board. Now, a normal person would’ve drawn garments in a solid, or easier-to-find kind of print. I decided I just had to have my wide navy/white stripes.

So I sewed my own. I bought peachskin fabric from Joann’s in navy and ivory, cut them into 4″ strips, and sewed them together with a 1/2″ seam allowance so each stripe ended up being 3″ wide. Perffffection.

2016-03-24 16.16.42

Drafting this was a bit of an adventure. Basically I wanted to re-make the Arrow dress from Dear Creatures (looove), but with a bodice that would actually fit me (I think they draft for an A or B cup and I’m a D –my bewbs are definitely not the happiest in that dress), and with a slightly more modern silhouette.

2016-03-24 16.20.39

I started off with the same bodice sloper we use for class. For the front I did a sleeveless adjustment, made a cut-away armhole, and lowered the neckline a bit. Then I drew in a princess line variation from the center front neck diagonally down to the side seam, and moved the side bust dart to the neckline, and transferred the waist dart (with a new apex 3/4″ over like Armstrong says) to ease. (You can kind of see it in the photo right above.)

The back was a little more tricky because my pivot points happened to be right where I wanted the back cut out. I ended up basically just doing a lot of contouring and it seemed to work out. It took a few tries though. The first attempt had a strange lump where most people lack a body bulge, and another attempt was slightly sideways.

The skirt is the same skirt pattern from my Christmas dress. And lastly, I drafted a flat roll Peter Pan collar because why not. :]

In terms of construction, I lined the whole thing with muslin because I have a crap ton of it for school, I needed something light in color because of the white stripes, and I was on a roll and didn’t want to have to stop and drive to Joanns for actual lining fabric.

The verdict: it fits a million times better than the Arrow dress! The only thing I’m a bit sad about is that the bottom edge of the bodice seems to have stretched out a bit, possibly when I was sewing the stripes, and there’s a weird wrinkle in the tummy area of the bodice. Oh well. Also I don’t love what’s happening with the stripes in the back. It’s like my bum ate most of the white stripe.

Anyway, other than those two tiny details, I adore this dress. I’ve already worn it to a party and it was the perfect mix of twee and fancy.